old door knob spindles

The requested URL /Articles.php?id=14 was not found on this server.Robinsons Antiques did furniture restoration and refinishing from 1967-1990s & is dedicated to the restoration of your antiques. We have a free hardware matching service. We find original replacement hardware for approximately 90% of requests. We have been in business since 1967 and have restored many thousands of pieces Open 24/7 on the web Sun-Fri by Appointment at the Shop Closed Wednesdays & Saturdays 2015-11-01 TR6 Project update 2014-11-24 the wheel build 2014-11-13 fuck cancer, and this one in particular 2014-10-27 a commuter bike 2014.10.16 TC Club Meetup report 2014.10.6 The kitchen project 2016-03-19 A fix for rattling old doorknobs My house was built in 1909, and has the vast majority of delightful and quirky details that were originally installed. Like the barely cemented-over cistern in the basement, and the lighted push-button switch in the kitchen that turns on the indicator light but doesn't seem to do anything else, and all of the original door knobs, rattling on their little square spindles.
It's not a huge thing, having rattly door knobs, but when you're trying to make your way to the bathroom quietly in the middle of the night it's nicer if they're quiet. Tightening them doesn't really help, because the spindles are just a bit too long, and the square holes on the knobs are worn just a bit, and that's what makes them feel loose, not loose screws. I fixed them with 2 changes, taking up some slack in both areas. First, I bought some nylon washers with a 3/8" inner diameter and used those behind the knobs. They're about 1/8" thick, and fit within the escutcheon plate, so they're hidden when installed but take up slack from the slightly too-long spindle (or the slightly shrunken 100-year-old maple door). They're a snug fit on the spindle, but not stressed enough to worry about them breaking. The second fix was for the knob itself. It fits fairly loosely on the square spindle, so i wrapped the end with a few layers of PTFE plumbing tape. It's not tight, but takes up enough space to make it feel better.

Between the 2 changes and some fresh lube in the lock mechanism, the doors feel much smoother and tighter, for about 10 minutes work per door. this is fun, thanks, paul!Home sweet home… it feels good to be back! Thanks to everyone for sticking around while we took some time off to visit Florida. Our tile guy was supposed to start on the fireplace last week but he’s been working on another job so it keeps getting pushed back (the frustration!). We’re hoping he’ll start this week (or we may just have to find someone else). In the meantime, I’ve been tackling some smaller projects. I finished one yesterday that I am so excited about, it’s worthy of its own post (updated after new reader info!) Vintage hardware lovers… today is your lucky day. So, remember how the downstairs door looked like this a couple weeks ago? A while back we upgraded all of the knobs in this oval oil rubbed bronze style, which was fine, but once I painted the door black I wanted something that popped a bit more.

Vintage hardware has always spoken to me, and I’d be in heaven if all of the doors in our house could look like these… But seriously, have you looked at the prices of these things? Most will set you back $100 or more, and if you plan to do a whole house… well, forget it. Not an option for us. Not only that, but most don’t fit with the modern 2 1/8″ bore hole size and you’ll need to completely modify or replace the door to get all the parts to fit.
exterior wood door with sidelightsSo not worth it.
exterior door sill thickness I’ve been determined to find another way.
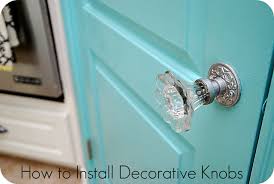
bi fold door systems australiaAfter much searching, I stumbled upon this glass knob set for the very reasonable price of just under $14.39 shipped:
shower door seal strip canada
(it comes in nickel and brass as well). To complete this project you only need the door knobs though (assuming you are happy with the color of your latch and strike plate). You can get the knobs easier, like this one for under $8 on Amazon or Home Depot (if you don’t mind spray painting the metal, or you can get the bronze for $10): The problem with the complete door knob kit that I purchased is that it doesn’t fit standard bore holes (despite what the Q&A says).
garage door bottom seal gasketThe screw holes are placed 2″ apart but the bore hole is 2 1/8″ so there’s nothing for them to screw into.
garage door companies in northwest arkansas The solution is to buy these wooden inserts which you attach to the inside of your bore so the screws have something to go into:
2007 honda civic si 4 door for sale
But even those are way more than I wanted to spend, and more hassle than it was worth. I had to come up with a solution… so after some pondering and google searching, I came across these back plates (also called escutcheons): They were $13.98 shipped which I thought was a great deal considering my alternatives. And I knew I could easily customize them to get rid of the brass. While writing this post, I found them at Amazon for $8.99 shipped and Home Depot for $5.80 shipped! Now that I had all my parts, it was time for a little DIY. First, I had to remove the metal ring on the holes because my spindle wasn’t long enough to reach through to the other side: I wasn’t really sure what I was going to do with the brass finish, so I started by sanding it down a bit (with 220 grit paper). There was a silver metal underneath which I let peek through. Then I sprayed a light coat of satin black. I didn’t like how it looked up against the black door (which is a cool/light black) so I sanded it down and decided I liked what was happening (you can see the sanded plate on the left and unsanded on the right).

Then I dug around in the garage and found some gold and brown spray paint, so I started experimenting. I added some gold and sanded a bit, and once I added the brown it gave it a subtle rusty effect which looked very realistic. After a bit more sanding, they looked like this:The whole thing only took about 10 minutes (including waiting for the paint to dry in between sanding). Installation was super easy. The latch and strike plate were staying so I simply removed the old knobs, slid the new ones through with my new back plates, screwed the plates directly onto the door, and tightened the handle. Easier and faster than replacing standard door handles (and about the same price!) I love the way the rusty color coordinates with my fall wreath. Because I didn’t shop around enough (oops) my price came to just under $25 for everything, but if you buy the back plates for $5.80 and the glass knobs for under $8 on Amazon or Home Depot (and use your existing latch and strike plate), you could get the same thing for under $14.

That is seriously cheap for this setup. UPDATE: A reader just informed me that they sell a kit like this at Home Depot for $19—it includes the mortise latch but you could just leave that out for modern style doors. Unfortunately I don’t live near one but that’s also a good option if you just want to buy everything together! I would replace all of the knobs in my house in a heartbeat, except that I haven’t been able to find any vintage style privacy knobs that work with modern doors (and aren’t ridiculously expensive). If you know of one, let me know! In other hardware news, I got my pendant pulls in for our sideboard—I found them on Ebay for only $3.50 shipped! They came in brass, so a couple quick coats of black paint later and they’re perfect (and I was able to leave the key hole exposed!) And that’s all for now. I have an almost finished project in the garage right now that needs my attention today… those of you who follow me on instagram got an early preview 🙂