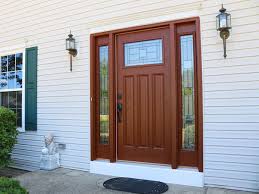
where to buy prehung doors

Q. I want to save some money on an upcoming project. It seems to me that I could successfully hang interior prehung doors if I had some guidance. Surely it can't be that hard to do. Of course I want the doors to operate smoothly from now on. What must I do to get trouble-free door operation?A. Hanging interior prehung doors can be somewhat challenging. Don't underestimate the complexity of the job by any means.Fortunately, though, it requires a few simple tools and a minimum of materials. You'll need a 2-foot level, a 4-foot level, a hammer, a nail set, a screw gun, a small square, a bundle of wood shims, a pound of 8-penny finish nails and several 3-inch-long drywall screws.With prehung interior doors, much of the work is already done for you. But there are still steps you must take to get a perfect fit.Typically the manufacturer will leave some extra length on each of the side jambs. This is done so you can adjust for a floor that is out of level across the width of the door opening.

Checking the floor is the first thing you'll want to do.You do this with a 2-foot level. If the floor is out of level across the opening, one of the jamb legs, the one on the high side of the opening, will need to be shortened. If you fail to make this adjustment in length, one of the jamb legs will end up floating in the air as you begin to secure the jambs to the rough opening.The door slab itself is almost always perfectly square. The trick is to adjust and support the jamb in the rough opening so that the spacing between the jambs and the door is consistent all the way around the door.
garage door repair cypress caYou start the job on the hinge jamb.
garage door repair taylor michiganUse the 4-foot level to check the hinge-side rough opening to see if it is plumb.
doorbell buy india
If it is out of plumb, try to measure how much and where it is out of plumb. You will need to know this information so that you can insert the proper amount of shims between the jamb and the rough opening as you start to hang the door.Position the door and the jamb in the rough opening, and use one or two 8-penny nails to temporarily tack the hinge jamb into place. Use the level and necessary shims to get the hinge jamb as plumb as possible.Be sure that the doorjambs are flush with the finished wall surfaces on both sides of the wall.
garage door repair commerce miIdeally, you would like to see the jamb project beyond the finished wall surface by about 1/32 of an inch.
screen door repair rochester nySlide shims as necessary between the jamb and the rough frame at each hinge location.
opening for prehung door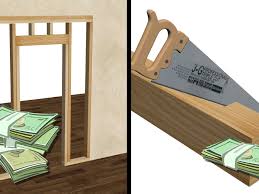
Tack the door in place with additional nails and close the door.Stand on a ladder and check the top of the door to see if the spacing between the door and jamb is equal across the entire width. It should be an 1/8-inch gap or so. You should have a similar gap on the hinge side. If the top gap is not consistent, you need to readjust the length of one of the side jambs.Once the size of these gaps is the same, it's time to work on the latch or doorknob jamb. Simply slide shims between the jamb and the rough opening until the gap is consistent and the door operates smoothly.
used 4 door jeep wrangler dallasIf you are satisfied, nail the jamb in place at the shim locations. The space between the shims should not exceed 24 inches if possible.The key to years of trouble-free service is to screw the hinge jamb to the rough opening. Without screws, repeated operations can cause the door to sag slightly.
I prefer to hide the screws behind the hinges. To do this, remove the screws from one hinge at a time on the doorjamb. Gently pry the hinge out of the jamb, and install a long drywall screw through the jamb into the solid wood of the rough opening. It's an old carpenter's trick I learned long ago.----------Write to Tim Carter, c/o The Chicago Tribune, P.O. Box 36352, Cincinnati, OH 45236-0352. Questions will be answered only in the column. For step-by-step photos of Tim hanging an interior door and other tips on trouble-free doors, please send $3 to the above address. Ask for Builder Bulletin No. 370. Want to talk to Tim? Call him from 9 to 11 a.m. Central on Saturdays toll-free at 888-737-1450. Therapists see no developmental benefits from seatsDark meaning of bubble-gum Pumped Up Kicks is tough to chewPain relievers: What are the differences? Barkley Fined, Suspended For Spitting IncidentToo cold for car wash? Motormouth answers your questions10 reasons why you want the jobEdit ArticleHow to Frame a Door Opening
Two Methods:Measuring and CuttingPutting It TogetherCommunity Q&A If you want to install a door in your house, you have to first frame the door opening to prepare it for the installation. With a ladder, some nails and a hammer, you're well on your way to outfitting your own rooms at a fraction of the cost. Decide whether to buy a frame or build one. Know what lumber to purchase. Determine the size of the framing members in the wall you are framing the door in. Wood studs are most often 2x4 nominal size, but 2x6 and other size studs are also used in residential framing. You can purchase the lumber you need at a lumberyard or home improvement warehouse store. In terms of the best type of wood to use, feel free to choose lumber based on aesthetics rather than strength. Interior doors and frames are not exposed to the same harsh elements as exterior ones, so your main concern should be picking a type of wood that you like and which goes well with the door you're planning to hang on it.

Common wood types used for interior frames are: Pine (the most popular) Determine the size of the door. Normal interior doors are 2' 6", 2' 8" or 3' wide and 6' 8" tall. Take into consideration what types and sizes of items you will be placing in the room. For example if the door leads to a laundry area, make sure the door will be large enough to fit a washer and dryer through, and preferably 36" wide. Determine the size of the door opening. The size of the door opening will vary depending on the size of the door you plan to install. A typical door opening is 2 inches (5.1 cm) wider than the door size being installed to allow for the thickness of the jamb material and shims to plumb the jamb. Measure your door carefully and cut the opening to fit. Make the opening the width of the door plus 2 inches (5.1 cm), and if additional studs are needed, a space for these, as well. Cut the studs and sill plate to the width required. Never cut a wall top plate!

The boards secured in an upright position along the sides of the frame are referred to as studs., and are used to support the wall. The board that transverses the top of the studs is called the top plate. To make the studs, measure the height of the door to be installed. Cut 2x4s to the height of the door plus 1 1/2 inches (5.1 cm) to allow room for the top of the frame and allowance for leveling the jamb. To make the door header, cut 2x4s to the width of the original opening. A "king stud" is one that runs continuously from the top plate to the bottom plate. The "jack stud" is nailed to the king stud, but it's shorter as it supports the door header. Cut the door header. To make the door header (the top of the door frame), cut two 2x4s to the same length as the width of the original opening and nail them securely together. Insert the top plate. Nail the top plate through the ceiling into the ceiling joists or blocking using 12D nails. Insert the sole plate.

Nail the sole plate to the floor, driving the nails into the floor joists or blocking. Don't nail the sole plate to the floor between the jack stud locations because this portion of the plate will be removed before the door is installed. Use Tapcon screws (or other appropriate fastener) to insert the sole plate. Nail the king studs in place. Use 12D nails to nail the king studs in place. Drive the nails at an angle to make a toe-nailed joint, or you can attach the studs with metal connectors. Nail the jack studs to the king studs. Position the jack studs against the inside of the king studs, and nail them in place.Take two 2x4s that are cut to a length that equals the width of the original door opening. Use them to make a header that will sit above the door. Once in position, nail these header pieces together to secure. [4] The header should fit between the king studs and sit snugly atop the jack studs. Insert a cripple stud. Measure and cut one (or two depending on the width of your door) studs to fit between the header and the top plate.