larson storm doors glass installation
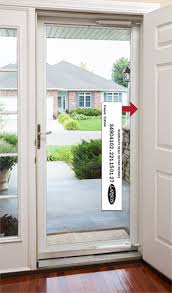
Installing Your Storm Door What makes the EasyHang® System so easy? An exact fit with mounting rail extenders Pre-drilled hinge locator holes Easy mounting with no cutting or hacksaw needed Easy Jamb Hole Locator System Provides: Exact alignment of the hinge rail Correct placement to the home Retractable Screen Away Models LARSON Savannah White Mid-View Wood Core Storm Door (Common: 32-in x 81-in; Actual: 31.75-in x 79.875-in) Item # 25066 Model # 37082031 In-use/lifestyle images - accessories not included The innovative Screen Away® retractable screen hides in the top of the door, providing a clear view when not in use; the screen glides up or down to let in more or less air as needed for unlimited ventilation control Brushed nickel Secure Lock® built-in latch with matching interior and exterior levers DuraTech® surface over solid core adds maintenance-free finish with age and weather protection that hides scratches and resists denting

Color match adjustable-speed closer included Adjustable bottom sweep adjusts to uneven sills to seal out harsh weather Heavy duty weather stripping helps seal out harsh weather and drafts EasyHang® installation is faster and easier than traditional methods and offers a no cutting system with mounting rail extenders for an exact fit every time Reversa-Hinge™ allows for right or left hinge mounting to fit Opening Size of 31-7/8-in to 32-3/8-in wide and 80-in to 81-in height36 in. x 80 in. 3000 Series White Right-Hand Fullview Easy Install Aluminum Storm Door with Nickel HardwareWhy Choose Our Storm Doors?Few areas of your home deserve the attention that your entryway does. At Sugarcreek Industries, choosing the right storm door for your home has never been easier. Our storm doors excel in Beauty, Durability, Security, & Energy Efficiency.We offer a Lifetime Limited Transferable Warranty on all of our storm doors! Come see Sugarcreek Storm Doors today at Lisbon Storm, Screen & Door!
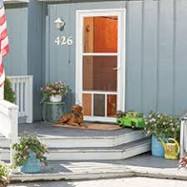
For more information on Provia storm doors call us at (414) 445-8899/(888) 278-8205 or contact us by email.Doggy DoorsPet DoorsStorm Door With Dog DoorSanta CristobalItsadogslife WelcomehomeRedundant HouseDoggie DynastyDog'S BedroomDoggy DaydreamsForwardNo cutting into your house for the doggie door! This LARSON storm door comes with a pet door already built-in. #ItsADogsLife #WelcomeHome #MyLarsonDoorNew storm doors are easier to install, with plenty of standard sizes to fit almost any entryway—but there are still tricky spots. Follow a pro through the installation process and learn the tricks and techniques that the instruction manual doesn't cover. New storm doors are easier to install, with plenty of standard sizes to fit almost any entryway—but there are still tricky spots. By the DIY experts of The Family Handyman Magazine You no longer have to put up with a rusty old storm door that bangs shut every time the kids go out. storm doors are stronger, smoother and a heck

If you have a hacksaw, screw gun, a short level and a pair of side cutters and two to three hours, you're on your way to saving the cost of a professional installation. Replacing an old storm door or installing a new one is a perfect Saturday morning project,
best car in gta 5 fully upgraded even if you have limited carpentry skills.
barn door hinges uk Step 2: Selecting the door To find the size of the storm door you need, simply measure the height and width of the main door. doors are 36 in. wide and require a For this article, we one we show has The other common type, a “ventilating” storm door, has glass panels that slide open or closed over the screen, much like Nearly every storm door sold isThat is, you can install it with

the hinge on either side. directions tell you how to do it. When you buy it, you don't have to specify which way the door must swing. to the exterior door screwed to the door (ours was), or you may have to mount it once you determine the door swing direction. doors, you'll also have to drill holes for Step 3: Getting started Begin the project by folding open the box and removing the glass storm panel. Set it and the screen panel in a safe place out of the wind. Then check for damaged or missing parts by comparing the contents with the parts list in the returned, repackaged and sold as new. One of the parts had already been cut to length and the mounting screws wereUse the cardboard as a work surface to prevent scratching the parts while you work on the door. Your door may come with a protectiveOnly peel off those areas needed for installing hardware during way the door will be protected from

complete, peel away the plastic. Determine the door swing. general, hinge the storm door on the same side as the main door. If there's an adjoining wall or rail, it's best to have the door against any light fixtures? switch wind up on the latch side whereIf there's a strong prevailing wind, it's best to have the door hinge side face the wind direction. gusts can't fling it open and break it. Why a storm door? A traditional storm door was a handsome but vulnerable wooden main door from harsh weather and helped to insulate it. Today's better insulated and protected main doors have little need for a storm door and are often eliminated from new homes, showing off fancy front storm door (like the one we're installing here) still showcases the main door and, when screened, allows you to take advantage of those cooling Step 4: Out with the old storm door Taking off an old aluminum door is usually

just a case of unscrewing the mounting screws on the door, closer and safetyBut sometimes there's caulkYou can usually cut through the caulk with a utility knife. But worse yet, you could find old caulk between the frame and the door casing. If so, you'll have to pry the frame away with an old chisel and scrape the trimA heat gun may help soften the caulk. Get rid of an old door by throwing the glass panel in the trash, and then cut up the aluminum frame and door with a circular saw and a carbide-tippedToss the pieces into the Wooden storm doors generally have hinges that are mortised (notched into the wood) and screwed to the door casing. Don't worry about the hinge or latchWhen you install your new storm door, they'll be hidden behind the Step 5: Prep the opening Storm doors hang from the door trim, technically called “exterior casing.” door has never had a storm door (as in our situation), you may have to extend

the trim between the door and a sidelightThis is the most difficult situation you're likely to encounter. have to rip a new trim piece to match the thickness of the other trim (usually 1-1/8 paint, do it now. It's a pain in the Manufacturers make storm doors a bit narrower than standard openings to make sure they'll fit. If your opening is typical, you'll have to “fur out” the sides to center the storm door in the opening. You'll nearly always need to install at least one 1/4-in. furring strip (screen molding usually works fine) on the hinge side (Photo 6) and possibly even have to add another one to the latch sideTo figure this out, measure the exact width of the opening, that is, the distance between the inside edges of the(Measure at the middle, top and will usually list the minimum widthSubtract that width from your measurement and make the furring strip thickness along the hinge side about half

Step 6: Install the door It's important to mount the door tightly to the hinge-side trim. latch side to make sure it snugs up tight Follow the photos with your instructions for the rest of the installation steps. Door latch and Z-bar systems vary. Cutting the latch-side Z-bar is a bit fussy. The idea is to center it on the latch andObserve where it strikes the sill and cut the bottom at an angle thatThen cut the top so it fits against the top Z-bar. Don't worry if the latch and lock bolt end up a bit off-center, as long as they work smoothly. You may need to chisel out the latch or deadbolt pocket as we show (Photo 11). It all depends on the door latch style. After installing the door sweep and closers, adjust the closer tension. with the window panel rather than theThe closers should be set with the door at its heaviest. want to reset a gentler setting for the Finally, it's a good idea to save the

boxes for the window and screen panelUnder a bed is a great safe storage location. Dealing With Warped Doors Storm doors often appear to be warped because they don't rest evenly against the weatherstripping However, it's usually the entry door trim that's a bit out ofSmall gaps may disappear when you install the door closers, especially if your door comes with one for the top and one for the bottom. doesn't do the trick, try prying out the Z-bar slightly and slip in a shim to close the gap. Bigger gaps call for more all the Z-bar screws and remove the screws at opposite corners of the door. slip a shim behind the corner screws, opposite the gap. Tighten the corner screws to see if the gap closes. sizes of shims until the behind the rest of the screws as you tighten them to taper the gap between the Z-bar and the door casing. the shims, then caulk the gap