garage door opener fob
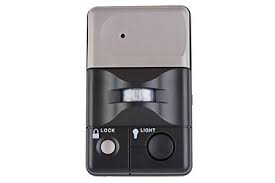
_FOBNumber requested_Wewatta Garage Door Opener_Delgany Garage Door OpenerNumber requested*Tenant Name*If this device is for a tenant, it will be regestered in the tenants name.First Name*Last Name*Unit #*Phone*Email*How do I erase the remote control from the garage door opener's memory? There are a few instances that the memory of your opener would need to be erased. NOTE: Erasing the memory will remove ALL remote controls and keyless entry codes from the garage door opener. Begin by locating the LEARN button on the back or side of the motor unit; generally this is on the same side as the antenna wire. You may need to remove a light lens cover or open a control panel to gain access. The LEARN button may be green, orange, red, purple or yellow, and will have a small LED next to it. Erase all remote controls and keyless entries Units with a green, orange, red, purple or yellow LEARN button: Erase all remote controls, keyless entries and MyQ® devices from the garage door opener

To reprogram a remote or keyless entry, go to How do I program my remote control? How do I program the keyless entry? Click here to see a video about how to erase the programming of a remote control. See Also: How to erase the memory of your garage door opener youtube video. Answers others found helpful Video - Erase the remote controls from memory How to program a remote control How to find the "Learn" button on my garage door opener How to program accessories to your Internet Connectivity DeviceThis instructable explains how I setup a Raspberry Pi to open my garage door using a smarthphone. While this has been done before, I thought I'd post my solution. This was my first hardware project and instructable ever and I'm sure I made some mistakes. So, when you find one let me know! Project Overview: What we will be doing is turning the Raspberry Pi into a small web server. When you access the webserver from your browser of choice, you will have a big button that triggers the garage door via a relay.

We will wire a very basic circuit to the Pi's GPIO pins and upload a website that triggers the circuit. When the relay is triggered, it closes the circuit hooked up to the garage motor and opens the garage.Why would anyone want to do this? Well, my garage door opener was broke and this was cheaper than replacing the other system. As an added plus though, you could wire up additional sensors and be able to make sure your garage is closed remotely if your were so inclined.Shopping List: I consider myself pretty cheap, and I tried to keep the costs minimal.
sliding screen door handle home depotAll of the items are available on prime.
interior door sweep carpet1.) Raspberry Pi - Model A - $32 2.)
crystal door knobs home bargains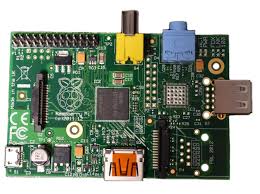
Wifi Adapter - $10 3.) PSU - $5 4.) 5v Relay - $6Total: $53.00 You will also need an sdcard >= 2GB and some wires, but I had extra of each.Step 1: Install and Optimize Rasbian (for our purposes)Show All Items This first step is to install an operating system to your rpi. I'm a bit of a debian fanboy, and had an extra 2GB sdcard, so I went with a shrunk version of Wheezy. On Ubuntu, I used gparted to format to fat32, and dd to write the img. After you install the OS, plug in a usb keyboard and hook up the raspberry pi to a monitor.
garage door parts douglasville gaAssuming you are using Wheezy, on the first boot rasp-config will automatically run.
front door camera costcoYou should use this tool to stretch the parition and enable ssh (under the advanced menu on newer versions I believe).
garage door repair auburn ca
After I installed my img, I also removed the GUI to free up some space. (If you have a large SD, you can skip this.) To do this type these commands:$ sudo apt-get remove --purge x11-common$ sudo apt-get autoremove This removes all packages that depend on X11 which is pretty much all of the GUI.Yes, you can program a key fob to a wireless 5877 Relay Module to open your garage door. The following instructions are using a 5834-4 Four Button Key Fob. The 5834-4 is pre-programmed with two serial numbers assigned by the manufacturer. Serial one number is located on the back of the key fob. Serial two is not printed on the key fob but will be one digit higher than serial one. Example: Serial one number A xxx-xx34, serial two, A xxx-xx35. Each button is assigned a serial and loop number found on the Installation and Setup Guide that comes in the box with the key fob. Typically key fobs are programed to arm, disarm, stay and panic. These functions are usually programmed for one button press. The 5834-4 Four Button Key Fob provides up to eight functions.

Four, one button press and four, pressing two buttons at the same time.To program the key fob to a 5877 Relay Module, select and assign a button or buttons to control the garage door opener. Designate the input type as BR (button type)., Press and hold the program button on the 5877 wireless relay module for one (1) second, then release. The LED will start to flash green. After it starts to flash green, press the button/buttons of the key-fob to enroll it. When prompted for the serial number press the appropriate button/buttons twice and release, or manually enter the serial number at the keypad. If enrolled properly the LED should stop flashing green. Repeat the same process to enroll up to seven (7) key fobs. When completed enrolling the key fob(s), test each key fob by pressing each key button enrolled in the relay module. The relay module should click for each wireless button press.Honeywell offers a 5877GDPK, a Lynx Touch Garage Door Opener kit which includes the wireless relay receiver and a SSA1 Z-Wave wireless siren and strobe alarm.