frigidaire french door ice maker not working

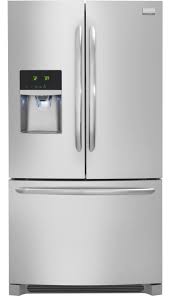
Frigidaire Gallery 27.2 Cu. Ft. French Door Refrigerator (FGHB2866PF) for 36 mos. for total of $2,956 Hover To Zoom | SpillSafe® Flip Up & Slide Under Shelves Effortless™ Glide Crisper Drawers Full Width Cool-Zone™ Drawer Our Frigidaire French Door refrigerator can handle all of your food storage needs, from its large capacity Cool Zone™ drawer that extends completely and provides space to easily store anything from sheet cakes and large platters to snacks and juice boxes, to our Spillsafe® Flip Up and Slide-Under shelves, which easily make room for tall or large item. 3 Door French Door Refrigerator 18.5 Cu. Ft. Capacity Meat / Deli Drawer with Full-Width Full-Extension Cool Drawer 2 White Store-More™ Fixed Door Bins 2 Gallon Adjustable Door Bins 8.7 Cu. Ft. Capacity Lower Basket with Adjustable Divider Lower Adjustable Basket Dividers Upper Full-Width Basket Design Express-Select® Capacitive Touch Water Filter Change Indicator Light Air Filter Change Indicator Light Quick Freeze
External Filtered Water/Ice Dispenser 36" W x 33-3/8" D x 69-7/8" H - Case Depth: 28-3/4" - Depth with Doors (no Handles): 33-3/8" - Depth with Doors and Handles: 35-7/8" - Case Height: 68-5/8" - Height with Hinges and Covers: 69-7/8" - Case Width: 35-7/8" - Depth (with Door 90° Open): 47-3/8" - Exterior Depth with Drawer Open: 55" Full -Width Cool -Zone ™ Drawer Spillsafe® Flip up & Slide Under Shelves Annual Energy (kWH): 717 Click here for more warranty details. 1 Year Limited Warranty - Power Type: Electric - Size: 28 Cu. Ft. - Installation Type: Free-Standing - Collection: Frigidaire Gallery - Crushed Ice: Yes - Cube Ice: Yes - Dispenser Light: Yes - Display On/Off: Yes - 1-Gallon Adjustable Door Bins: 2, Clear - 2-Liter Door Bins: 1, Clear - Hanging Can Rack: White, Left Door - Door Style: Soft-Arc - Door Finish: Smudge-Proof™ Stainless Steel
- Ice Maker: Yes, 2nd Ice Maker Optional - Ice Maker On/Off: Yes - Air Filter Change Indicator Light: Yes - Water Filter Change Indicator Light: Yes - Amps @ 120 Volts: 8.5 - Minimum Circuit Required (Amps): 15A - Power Supply Connection Location: Right Rear Bottom - Voltage Rating: 120V, 60Hz - ADA Compliant: No - CSA Certified: Yes - CSA Rating: Household - ENERGY STAR® Certified: Yes - Sabbath Mode (Star-K® Certified): Yes Frigidaire Gallery 27.2 Cu. Ft. French Door Refrigerator (FGHB2866PF) Reviews - page 2 Please enter your shipping zip code to check availability Please enter your zip code above to proceed. To add this item to your cart, please enter a zip code and select a location below.Appliance Service & Repair At GE Appliances, our goal is to ensure your satisfaction, while offering the highest levels of professional service at affordable and competitive rates. Update a Service Appointment or Check Pricing

beautifully lit inside (1) Bad Ice Maker (1) Sat In La Warehouse A Wee (1) The Shipping Was Awful (1) Week Late On Delivery (1)
bifold closet doors dimensionsHere's a great way to stay in touch on our daily deals and great savings.
frigidaire french door ice maker not workingEnter your email address below to sign up and receive our promotions and exclusive offers! We need a little more information to check the availability and delivery options in your area. Thanks, for your feedback. Find products and compare prices Find a local store Check on an order Please leave your comments and help us improve. If this is related to a specific issue, provide any available details (item number, order number, etc.) to help us resolve the matter faster.

You can also contact customer service directly. Find The Closests Outlet Stores Near You {{so.myStorePhone}} - Store #{{so.myStoreUnit}} Shop Store Inventory | | {{stores.city}}, {{stores.state}} - {{stores.storeType}} {{stores.address}}, {{stores.city}}, {{stores.state}} {{stores.zip}} {{stores.phone}} - Store #{{stores.unit}} Shop Store | | (Have a baby bottle?) Anybody know what babies and icemakers have in common? Well, OK, maybe not much, but here's one very handy detail: 80% of all the icemaker problems you'll see can be corrected using a baby bottle! Icemakers are set to fill for X seconds regardless of actual water flow, and the volume of water required is specified in cc's. It just happens that a baby bottle's a really handy icemaker repair tool, because it is graduated in cc's! And it's compact enough to fit into those cramped freezer spaces where icemakers reside. Not to mention it's always good for a few questioning looks (techs: leave the nipple on, carry it in plain view in your tool bag, and see what happens!)

If your icemaker is producing small cubes, hollow cubes, huge cubes, or a solid slab of ice, one of the first things you want to check is the fill level. And it's not as difficult as you(Hey, the hard part's wrenching that bottle out of Pookie's little fingers!) the refrig, pull the icemaker - usually one screw underneath, either 2 more or hooks above the cube mold - and unplug it. Take it to your sink and melt out any cubes with hot water. it and the refrig. back in, leaving it unattached from the freezer wall. Manually start a 'harvest cycle' (see below) and hold Pookie's bottle under the fill tube. You'll have to wait a few minutes, because the water enters near the end of one complete rotation of the cube ejector, which constitutes a 'harvest cycle'. Regardless your type of icemaker, you're looking for 125-150 cc's, with most working best around 140cc's, but anywhere in this range should work OK. (When replacing your icemaker with a new one, always

check and adjust the water fill level this way too. a lot of trouble.) Manually starting a 'harvest' cycle: Note: Some newer model refrigerators require freezer door switch closure to power up theIf your icemaker doesn't start when you jumper or turn it, hold or tape the freezer door switch closed. (Thanks for the reminder, Ray!) Two basic designs of domestic, analog icemakers are most common. (Electronic models come & go from time to time - shudder - but we aren't seeing them in great numbers - yet) Pop the front cover off yours and check the large gear front & center. the front plate is metal, and you see a Phillips screw in the center of this gear, that's great - you own a 'microswitch'This is the most reliable home icemaker ever made! Here's what it looks like with the front cover To manually start a cycle, either grasp the ejector and rotate upward (CW fr. front), or use a screwdriver to turn the smaller gear (CCW) if yours has a slot for

Once you turn it a short distance, you'll hear a little 'click and the unit will start to run. Make sure the ice-sensing bail has clearance to raise & lower during this test cycle. If there's no screw, that's OK too, you own a 'modular' unit, and even though we, um, make more income from these
, they're still pretty decent. modular looks like with the front cover off: To start a cycle with this one, don't attempt to turn the gears manually - they'll break! You'll need a short piece of insulated solid copper wire, 12-14 gauge, to use as a 'jumper'. Note: Before proceeding, I want to stress this jumper wire must be insulated, because you're holding onto a 'live' 120 volt jumper here. precautions apply (please see my (Just strip a 4 in. piece out of some 12-2 'romex' used in house wiring.) Strip the ends back about � in. and bend it intoThis wire is inserted into the holes marked 'T' and 'H' in the front of the icemaker to bypass the tstat and run a cycle. 
insert it into any holes except 'T' & 'H' !) Remove the jumper after a few seconds - you'll hear a tiny click - and let it run, waiting for the fill at the end. Again, make sure the ice-sensing bail has clearance to raise & lower during Both icemaker styles have a small screw to adjust water levels. The modular type has very little adjustment available, though (even though the literature says 20 cc's, I only find about 10 cc's available, via a tiny plastic screw on the right side - see picture below), which means the other components in the water supply have to be right (saddle valve mounted properly - not to bottom of pipe, clean fill valve screen, etc) Just rerun a test cycle after eachAnd be sure to wash & return Pookie's bottle when finished with the test. Was this article helpful? Please click the "donate" button on the left side of this page to help me keep this information free! This article may be reprinted and distributed freely only