bifold closet doors removal

Whether your closet doors fold, slide or simply open and close on hinges, you should make repairs, if needed, before you go about refinishing them. Bi-fold closet doors are constructed of two separate pieces connected by hinges; each bi-fold door is anchored by spring-mounted pins on the top and bottom of one side of the door depending on which side the closet opens on. The other side of the door slides on a track along the top of the closet, and is connected by a roller pin. Often, over time, the doors can become misaligned and pop out of the track. When this happens, it is probably because the top anchor has moved just a bit — enough so that the door goes out of alignment. This usually requires just a readjustment but can also mean it's time for replacement of the parts. Open the door all the way and check the top anchor pin to see if its sliding bracket has loosened and moved out of position. If it has, move it back so that the edge of the door is perpendicular with the jamb and retighten the bracket in that position.

You may need to remove the door to evaluate the situation. To do this, open the door all the way and lift up with both hands. The top pivot anchor will depress (because it is spring-loaded) and the bottom pin will slip out of its bracket. Then pull the door out toward you. The roller should snap out easily.
samsung door lock brochureYou can re-hang the door by following this procedure in reverse and then depress and snap the roller pin into the track.
door locks suppliers in kenyaIn most cases, the track will not need to be replaced unless it has become warped or otherwise damaged.
windows and doors milton keynesYou can find all the needed replacement parts, including full kits at your local True Value hardware store.
garage door springs raleigh nc
Follow the manufacturer's directions for proper installation. If your door has slats or louvers, these are susceptible to accidental breakage. You don't have to replace the whole door though; you can simply repair the slats. Just sand away the broken end or ends of the slat that connect to the rest of the closet door using fine-grit sandpaper, making sure to smooth away any splinters and rough edges.
internal oak doors leicestershireApply some wood glue to the ends of the slat and then push it back in place and hold it for a minute or two until the glue begins to harden and adheres.
double glazed door bottom sealThen let the glue dry completely, as recommended by the manufacturer.
best deck stain for pressure treated wood reviews
Sliding closet doors work similarly to folding doors and commonly become misaligned and stuck, or skip off of their tracks. If you notice a sticking door or if it has come off of the track, determine the source of the problem and try to fix it before the problem gets worse. Don't force a sliding door. One typical cause is a dirty or obstructed track. Remove dust, dirt and debris from the track using a vacuum or hand vac and a damp rag. Often screws can become loose and begin to pop up which obstruct the track. Simply tighten the screws with a screwdriver. If the door sticks or is hard to slide, try tightening the track or check to see if the rollers have worn or been otherwise damaged. Use a lubricant such as WD-40 or 3-in-1 multipurpose oil on parts that work but require a little assistance to move. Lightly hammer out any dents along the track that might cause the door to stick. Doors often can stick due to a misaligned floor guide. If it has moved out of place, fix it by putting it back in the right position or replace it, if needed.

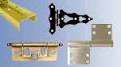
As with bi-fold closet doors, sliding door hardware and replacement parts can be purchased separately and in kits. A standard door, properly hung, should have a gap between the door and the frame of about the width of a nickel all the way around when closed. If the frame goes out of square, or wasn't hung correctly, the door can begin to stick. Find out where the door is touching the frame making it stick. If it gets stuck at the top, you can trim the top of the door by removing it and trimming it with a circular saw. In some cases, you might be able to sand it down with a belt sander. This comes in handy, as you want to trim off just enough so that it stops sticking. You can use this same technique to fix the bottom of the door if the bottom is where the door is sticking, or dragging on the floor. If the door sticks on the top or bottom edge, opposite of the hinge, check the hinge to see if its screws just need to be tightened. If it sticks on the hinge side and the screws are tight, it might be that the hinge mortises are set too deep or the hinge is bent.

If the hinge is bent, replace it. If the hinge is set too deep you can remove the hinge screws, add a piece of thin cardboard behind the leaf of the hinge and then replace the screws. Tighten all hardware on the door's lockset if it is loose; replace a broken or malfunctioning lockset. Nicks, dents and scratches on wood doors can be filled and covered up with wood putty.Curtain Instead Of DoorCurtains Instead Of Closet DoorsCurtain Closet Door IdeasCloset IdeasCurtain Door IdeasCurtain DoorsCurtain RodsKawczynski HouseAsh HouseForwardCurtain instead of closet door...I love this because all 5 of my kids have at some point broken their closet doors! Replacing those gets expensive!!!:In a house that is only 875 square feet, every extra inch counts. Even though the closet in the master bedroom was about 6 feet wide, it only had a 24 inch door, hampering access to much of the storage. By widening the doorway for bi-fold doors and installing a closet organizer, I was able to increase the useful storage space.

However, it must be noted here that I DID NOT structure the doorway properly. The construction techniques I present here are wrong! I have published this project only to show what I did. The idea was good, but clearly I did not know as much as I thought I knew, a problem that I share in common with lot of self-proclaimed do-it-yourselfers. When I bought the house, I was single and there was more than enough room to spread my “stuff” throughout the three bedrooms. Once I became engaged, it became apparent that I needed to use any available space much more efficiently. The master bedroom had a wall closet about 5 and a half feet wide with a standard depth. Access to this closet was originally through a door that was only 24 inches wide. At least half of the space in the closet was inconvenient, if not impossible, to access. Widen the doorway and install two 30 inch bi-fold doors to access the entire closet. After ensuring that I would not be messing with a supporting wall, I went to work inside the closet.
The walls were gypsum board and plaster and were up to an inch thick in places so my stud finder was not able to accurately detect the studs. I had to open the wall up to find the studs the old fashioned way. I carefully used a keyhole saw to cut a couple of holes inside the closet so I could see exactly what framing I was working with. My stud finder is able to detect electrical current and I was able to determine that no wires were present where I was cutting. Still, I carefully opened up a couple larger holes just to be sure. Once I confirmed that it was safe to do so, I used a reciprocating saw to cut the wall board flush to the studs that were not going to be removed. It was a messy job to say the least. The wall board was removed up to the top plate that was attached to the ceiling joists. A bottom plate was nailed to the floor boards and I now had now exposed couple of 2 x 4 studs. I removed the studs to create the opening that I needed. Now I needed to rebuild the header and do something about the void that was left once the bottom plate was removed from the floor.

For the floor, I cut a 1×6 pine board the length of the new opening. I stained the board with the same walnut stain that I used on the bi-fold doors. Using a circular saw set to the depth of the hardwood flooring, I cut out a section to the width of the board. I then simply nailed the new board in place. The contrasting threshold looks terrific and was a simpler solution than trying to match the hardwood floor. I measured the height of the opening and triple-checked my measurements to determine the size of the header I required to result in a rough opening that was the size required by the new bi-fold doors while accounting for the 1×4 boards that I had selected for the frame. I built the header as a separate module from the structure and then attached it with many three-inch screws. Fortunately, the top plate was level, so all I had to do was screw the new header to it. The sides were shimmed to provide a good surface for the screws to go into. A gorilla could swing off of this thing and not pull it down and it is certainly strong enough to support bi-fold doors.

It is actually the pivot points on the floor that bears most of the weight of the doors. HOWEVER, this is NOT the proper construction technique. See the box below. The proper way to frame around an opening for a door or window. Whether the opening is for a door or a window, the framing technique is the same. A header, usually a pair of boards at least 2×6 or 2×8 sandwiched together, is supported by jack-studs. The jack-studs are fastened to king studs which span the height from the bottom plate to the top plate. This structure provides support, effectively replacing the studs that would normally occupy the space of the opening. Although my structure was not proper, it was adequate. The opening was not in a supporting wall. The multiple screws were sufficient to hold my header assembly to the studs. Most of the weight of the bi-fold doors rested on the pivot point on the floor. By my own standards today, adequate is not good enough. I should have researched the proper structure before taking on this renovation.

I could have installed smaller doors and had a much stronger structure. Before hanging the drywall, I needed to attach some oriented strand board (OSB) so that the drywall would be flush with the existing wallboard. After three coats of compound and some sanding, the entire wall was primed and painted. Three years later I would hang paint-able textured wallpaper on this one wall to help hide the shortcomings in my workmanship. But this was the first time I ever worked with drywall, and for the most part, I believe I did a pretty good job. The bi-fold doors were the pre-primed variety, so to achieve a wood finish, I needed to use a gel stain (I selected walnut). It took a couple of applications of the stain and a couple of coats of polyurethane to achieve the finish you see here. I selected the walnut stain to contrast the finish on the other doors in the house because it would have been impossible to achieve a suitable match. I did get lucky with the stain for the trim. After a lot of trial and error at the paint store, we found a maple stain that closely matched the rest of the woodwork in the house.