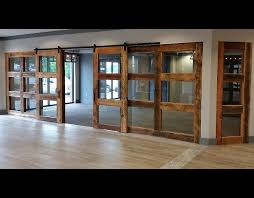
sliding barn doors with frosted glass

36" x 80" White Top Roll Mirror Sliding Door Select a Home Store to see Local Pricing 71" x 80" Espresso Bottom Roll Mirror Sliding Door 48" x 80" White Top Roll Mirror Sliding Door 48" x 80" Erias Frosted Glass Sliding Door 48" x 80" Mirror Bottom Roll Frameless Sliding Door 48" x 80" Champagne Top Roll Mirror Sliding Door 36" x 84" K-Frame Stain Grade Interior Sliding Pine Barn Door 48" x 80" Silver Top Roll Mirror Sliding Door 60" x 80" Erias Frosted Glass Sliding Door 47" x 80" Espresso Bottom Roll Mirror Sliding Door 60" x 80" Mirror Bottom Roll Frameless Sliding Door Double X-Frame Cherry Finish Interior Sliding Barn Door, with Hardware 36" x 84" Mirror Sliding Barn Door 48" x 80" Ashburton Sliding Door 60" x 80" White Top Roll Mirror Sliding Door 36" x 84" K-Frame Unfinished Sliding Pine Barn Door, with Hardware 36" x 84" Z-Frame Paint Grade Interior Sliding Pine Barn Door 48" x 80" Mirror White Bottom Roll Sliding Door

We ca Danielle GoldenRecently my Husband and I bought our forever home, which meant adding our personal touch to it.. As I was looking for a place to purchase my new additions I fou Barn Doors and More recently made me a farm table and bench.
plastic folding doors malaysiaIt is beyond beautiful and well built.
upvc bi fold doors costI know we will enjoy it for many years to come! The workm hip is awesome! You can tell they really care about their work from building the door all the way to instal I wanted to be and more. It really updated the look of my house and is going to provide some much needed pr d to see a cottage industry growing around prefab, barn doors that lacked real character and beauty. Rolled t Frank Van DykeIf you are looking for high end barn doors, Roxana is your only choice!! She is super detailed and only uses the best material and high quality hardware so you My husband and I have nothing but great words for Barn Doors and More.

They built us the most beautiful doors, and it wasn't easy at the size we needed. We are Michelle OlszewskiBarn Doors & More just delivered my table I love it!! I needed a custom made table due to the size of my dining room it's perfect. Roxana helped me pick the per Craig Wooldridge for a high end reaso Cindy HafifBarn Doors & More made a door out of 150 year old wood to take the place of my 2 old french doors going into my master bedroom. The owners knew exactly what col Megan Carthen Jackson the entire proce I had been searching for a while and could not find theCompare Brand new frosted glass sliding closet doors with CE certificate Yantai Brightway Import And Export Co., Ltd. US $50-160 20 Square Meters Transaction LevelWouldn’t it be a dream come true to walk in your front door and the first thing you see is this? Who doesn’t love poor lighting, and hollow core doors that don’t match the trim paint? Oh and did I mention that’s the laundry room? I’ve been on a “let’s-take-all-the-doors-off-because-they’re-ugly” kind of mood for a while, but considering our laundry room is atrocious….umm, I’d rather you just see a ugly discolored hollow core door.

That’s saying a lot. UPDATE: The laundry room is no longer atrocious!! You can check out the major changes here. (Speaking of taking off doors, check out how pretty things can become when you remove unnecessary doors in my foyer closet redo post.) Believe it or not, it actually looked worse at one time…Let’s just not talk about that… So back to the door. This terrible, ugly, annoying door NEVER stays where you put it. And it also takes up a ton of space in this room because it opens INTO it. I said all that to say: this door had to go. I needed that space in my laundry room more than it did. But I also needed the mess in the laundry room behind it covered up. Perfect solution: sliding french doors! I could totally DIY that. There are TONS of tutorials out there on this, so I’ll just give you a quick run down of what we did. I built the doors myself for around $60 ($20 lumber, $40 glass panes) and the hardware probably cost around $40. This post contains affiliate links.

If you purchase from these links, I may receive a small commission at no extra cost to you. Thank you for supporting this site so I can continue to provide free content. See disclosure policy for more details. 1×4 boards (amount depends on size of door) 1×6 boards (amount depends on size of door) 1 1/4″ pocket hole screws 1/8″x2″ steel bar for door(s) to hang on (length depends on size of door) 1/8″x1 1/2″x9″ steel bar (two per door) to attach pulleys Drill and assorted bits up to 1/2″ I made the doors from 1x4s and 1x6s. I used my Kreg Jig and 1 1/4″ screws to drill pocket holes in the 1×6 boards to attach to the 1×4 sides. I bought two long narrow glass panes from a local glass shop and spray painted them with “frost” spray paint. I routed out the back of the door frame (just like this post) so they would fit snug. I never take all the pictures I plan to….sorry no picture of that. Once the glass panels were fit into the routed part of the door, I cut 1x4s (the same length as the sides for the front) for the back of the door.

(The doors are basically 1xs glued together.) I stained the boards first, then glued them onto the back of the first frame so that the glass was “sandwiched” between the boards. See the picture here? I cut a 1×6 and stained it and glued it to the top of the back side, but for the middle and bottom sections, I did 1x4s. Then, I glued 1x4s vertically on the bottom. You can see this in the picture above. Once everything was glued and dry, I brought them inside and waited three weeks before hanging them…no seriously. I waited a while because I wasn’t sure what to do about our doorbell. It was right in the way, stuck out 2 1/2″ from the wall, and Danny wasn’t going to move it without a fight. Soooooo, I waited because I didn’t know what I was doing (I do this a lot.) Finally I got tired of looking at it, and just did it haha (I do this a lot, too.) I measured out how long I needed my rail to be. I went with 7′. And I measured how far my door needed to be from the wall so it wouldn’t hit the doorbell.
I cut a 1×4 the length of what I wanted the rail to be and got 1/8″ x 2″ flat steel bar that length (I actually got two pieces of 3 1/2′ scrap from work…it all works out the same). I got 4 garage door pulleys (2 each door), a flat 1/8″ x 1 1/2″ x 36″ steel bar, eight 1″screws, lock washers for those screws, four 3/8″ x 6″ lag screws, 3/8″ washers (I got 8, you may want more), and four galvanized 2 1/2″ nipples for spacers. Hang with me….I know it’s getting hairy. I found my wall studs and figured out where these would hit on my steel bars and drilled holes for the 3/8″ lag bolts to go through. These are what will mount the bar to the wall. Once the holes are drilled, I spray painted the bolts and bar black. While those were drying, I predrilled holes in the 7′ 1×4 I cut earlier where the studs would be and I predrilled holes in the studs themselves. We were using LONG lag bolts so our door will hang out far enough to miss the door bell, so we wanted the bolts to go into the studs pretty far.

Predrilling helps prevent the studs from cracking from such a large bolt. Then I put the bar together like this: first put the 1×4 down on a work surface, then a 3/8″ washer, spacer (which looks like this) Another washer, flat bar, washer, lock washer, 3/8″ lag bolt. I had the lag bolts in four places across the board (where studs were) and I tightened them down into the 1×4 with a ratchet so everything would stay in place while I transported it. Then I took it inside, lined it up, and screwed them into the wall. You can see I added several washers before the flat bar to make sure it was out far enough to miss the doorbell. I actually would have been fine without those, but hindsight is 20/20. Maybe some day I will take them out and fix it, but not today because it’s like a bazillion degrees out and if I sweat any more I’ll become a raisin. Then, I cut my 3′ flat bar into four 9″ pieces and drilled holes in them to attach to the door and the pulley. (Helpful hint: wear safety glasses when cutting metal.

I got a piece in my eye and it wasn’t fun.) I drilled the pulley holes first then measured how far up to drill the holes for the door. Make sure you attach the bar to the door so that it’s off the floor when you hang it. I spray painted those bars, the pulleys, and the bolts, attached them and hung the doors. And there they are…sliding doors!! Don’t you love them?! I still have to add stops on each side so the doors don’t slide off the end or run into things. Whew that was a long post. I apologize for the lack of pictures. This was honestly a trial and error process most of the time and I didn’t think to take pictures of everything I should have in the mess of it all. Another Helpful hint: make sure you measure twice and drill once 🙂 or you may end up with crooked doors that meet at the middle in the bottom but not at the top. I’d never make such an amateur mistake. I totally made that mistake. I will fix it and no one will know…so let’s just forget that ever happened….okay? O

ou will be seeing these doors again when I show you our laundry room remodel coming soon!! Keep your eyes peeled! UPDATE: I heard a lot of feedback (some good and some bad) about the green hallway. As much as I like a little color in my house (it is SOOOO HARD to be 100% neutral), I decided the hallway stuck out like a sore thumb and needed to be painted. To match the kitchen and living room, we went with grey on top and white on bottom. It took a while to decide if I liked it, but I think I made the best decision 🙂 and if not, paint color is always easy to change 😉 Don’t forget to pin for later! NOTE: As with any tutorial and how to on the site, I am happy to provide you with the instructions for free in the post. I enjoy inspiring others to make their own furniture and crafts. However, since I receive no compensation for these “plans,” I ask that you respect the time that was put into writing these instructions and please ask permission before using them to make and sell for profit.