roll up garage doors in cape town

Phone: (08) 9454 9677 Fax: (08) 9454 9611 Phone: (02) 9484 1295 Phone: (03) 9357 8878 +61 8 9454 9677 +61 8 9454 9611 Superlift Garage Door Openers You have arrived home. It's dark, raining, windy and cold. You press the button on your Superlift garage door remote and drive into your garage. Press the button again, the door goes down. You are dry, safe and secure. Welcome to Superlift Garage Door Openers. Reliable, competitive and friendly. As our name implies, we manufacture garage door openers. We have also expanded our product line to include gate openers, accessories and door hardware. Our range includes our two main garage door openers, the sectional/tilt door opener (SDO) and the roller door opener (RDO), both with additional models and features. Superlift now manufacture sliding and swinging gate openers. Something to suit most applications, all of which are compatible with Superlift remotes, so one transmitter will open your gates and garage doors.

We have a greater range of accessories to compliment our products and a full range of spare parts to suit every model, new or old. Based in Sydney and Perth, Superlift now has its own service and repair department for your garage door, gate and automatic opener problems. Servicing all brands, we have a network of agents all around Australia too. If you need a service or repair, contact us now for your nearest professional. ET LTX Remote Grey Self Learn 1 Button Centurion Classic 3 Button Remote Duratronic 2 Button Remote Sentry Receiver Binary Tri French 403 1CH Paradox RTX3R2 Wireless Expansion Module with REM2 Nova 1 Channel Receiver 433MHz CODEX PI 3 Button Keyring Transmitter Sherlo 1 Button Remote Code Hopping Lattice Controller, Surface/Flush Mount 1000tags Paradox REM15 Remote Control with Backlit Buttons Sherlo Receiver 150 Metre 1 Channel ET 3 Channel Code Hopping Reciever Sherlo 4 Channel Long Range Receiver

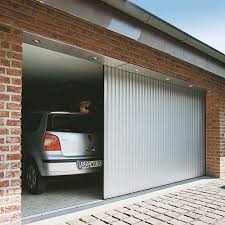
Light Duty Door Closer DT63 Roboguard 6 Button Transmitter Lattice Take-Up Head Incl Software - USB Type Centurion Nova 4 Button Remote Sentry Transmitter 3 Button FRENCH CODE Sherlotronics 6 Button Remote control keyring - Code hopping DigiEkey 4 Button Remote Nova 2 Channel Receiver 433MHz CODEX PI 1 Button Keyring Transmitter Centurion Green Remote 3 Button 433mhz Sherlo Receiver 500 Metre 1 Channel Improx Grey Omega 125kHz Tag Keyrings Sentry Binary Remote Control Receiver Centurion Smart Green 1 Button RemoteThe requested URL /sliding_door_gear_list.php?config=Straight+Sliding was not found on this server.Garage Barn DoorsExterior Barn DoorsBarn Door TrackGarage KitGarage IdeasBreezeway DoorsBest Garage DoorsBarn SlidingOutdoor Sliding Barn DoorForwardOnce we finish closing in our carport, these are the type of garage doors we want. The slide side to side, rather then sliding up.Sectional DoorRoll Up DoorsAutomatic GatesHydraulic Rising BollardsDocking BayAutomatic Hand DryersAir CurtainsSound BarrierAutomatic DoorsFire DoorGarage DoorRolling Shutter Road Safety ProductsAutomatic Boom BarriersTyre KillersTripod TurnstileMetal DetectorBaggage ScannerMulti Level Parking SystemsHand DryersInsect KillersShoe Shine MachineHygiene Bathroom Automation ProductsHygiene StationEntrance Automation SystemsUrinal Flusher & Sensor TapAir Freshener & DispenserAutomatic Soap DispensersPVC Strip CurtainShoe Cover DispenserSole Cleaner MachinesWaste ShredderHospitals & Pharma Industries ProductsHotel & Restaurant Management SystemTYRE CLEANING DEVICELane Managing SystemSliding DoorsNew Items

Technocrats Security Systems Private Limited Backed by a commendable experience, we are one of the reputed organizations engaged in Exporting and Supplying Automation and Hygiene Products including Shoe Shine Machine. In our range, we have Auto Swing Door, Sliding Gates, Swing Gates, Boom Barriers, Tyre Killer and Dock Levelers with Dock Shelter. Owing to our expertise, we also offer to our clients Auto Rolling Shutter, Tripod, Turnstile, Roll-up Door, Auto Sliding Door and Sectional Doors / Garage Door. These products cater to the needs of public buildings, residential buildings, offices, hotels, restaurants and shopping complex. We have maintained a meaningful relationship with prestigious vendors and manufacturers who have a sound knowledge in the respective domain. Our entire product range is sourced from reliable vendors based in Italy, Japan and Germany who fabricate these products as per the prevailing international standards. These business associates develop the range using high-grade stainless steel, aluminum and iron.
Soon after the process of procurement, our in-house quality controllers rigorously test the range for durability, performance and ease of installation. Our adherence to such paradigms has enabled us to deliver a fault-free end product to our clients. Furthermore, our experts also undertake extensive installation services at the desired location. Due to our ethical business policies and transparency in business dealings, we have garnered the confidence of our clients spread across the globe. We are looking for enquiries majorly from all over india.Products We Offer | All Rights Reserved (Terms of Use) Developed and Managed by IndiaMART InterMESH LimitedProgramming a 433 Remote To programme a 433 Remote, please follow these instructions, or alternatively download the following PDF file. - Turn the power off to the unit for 5 seconds - Turn the power back on - Push "Programme" button twice (eg. push push) - All 4 small red lights (LEDs) will light up & flash

- When the lights stop flashing, LED one will be on constant (not flashing), this means that it already has a remote control programmed in to it - You must then push the "programme" button again once, the #2 LED will come on, if this is also constant (not flashing), it already has a remote control programmed in to it. (NOTE: each light represents a remote code) - Keep pushing the "programme" button until one of the LEDs is flashing (this represents an empty memory slot). - Once the light is flashing, push and hold the remote button until the light stops flashing, and release the remote button. - Wait several seconds and automatically all lights will flash on and off. Once this has happened, you can use your remote. To wipe a code on a 433 Remote, please follow these instructions, or alternatively download the following PDF file. - Turn the power off to the unit for 20 seconds - Push the "programme" button twice (eg. push push) - After several seconds all lights will flash on & off.
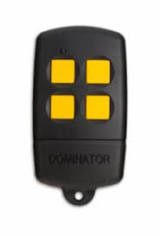
Light 1 will come on. - If you want to delete the code on LIGHT 1, push and hold the "programme" button until the light starts to flash - the code is now wiped. - You may then by pushing the "programme" button once, cycle through each LED light and delete when required. Programming a Cobra Remote To programme a Dominator Cobra remote, please follow these instructions, or alternatively download the following PDF file. - Select "Handheld" mode using the "LEARN" button on the unit (display shows "H" - Within 10 seconds, momentarily press the required button on the transmitter. The decimal point indicator on the display will flash and then stay on. - Repress the same button again momentarily, the decimal point indicator will flash and then the display will show the memory location number for that function (eg. The location number "xx" will be the first free handheld location number in the memory. - Your remote will now operate your door. To delete a Dominator Cobra remote from memory, please follow these instructions, or alternatively download the following PDF file.

- Select "Erase" mode using the "LEARN" button on the unit (display shows "E") - Press and hold a button on the required transmitter for 2 seconds until the decimal point stays on. - Release the transmitter button until the decimal point turns off, then press the transmitter button again for 2 seconds; the decimal point will flash and then stay on. - The display will flash twice (CLR) once the transmitter code has been removed from memory. - If you do not have the remote that you want to delete from memory, after selecting "Erase" mode: - Find the memory location of the transmitter to be erased - momentarily press button 1 on a transmitter to display the next used memory location number (eg. Momentarily pressing button 2 will display the previous memory location number (eg. - Once the memory location is located, momentarily pressing button 3 will clear the transmitter function that is memorised in the displayed location number. If no transmitters are stored in memory (memory empty) "H" will be displayed.