prehung interior doors what is
What is the best option for replacement windows & doors? I've been researching for over a year and cannot get clear/honest information. Hello - I hope my answer will help point you in the right direction. The reason you're having a hard time getting clear information is because there are hundreds of companies saying their window is the best. There are probably millions of different features you can choose to have for your windows and in price ranges from $169-$1200 (per double-hung window). I've been in the business for 15 years and have seen many different window products from many different dealers and manufacturers. This all comes down to: "what's important for you and your home?" If you want a strong warranty from a company who has a full-time service department to give you piece of mind and service your windows should needs be, or are you looking at only those companies who offer true wood interior windows that you can paint or stain to match the home decor? Whatever is your hot-button, then that's where you want to start.

I would recommend you first choose how you want your new windows to look. Wood-interior with vinyl clad is only offered by certain companies, while there is a vinyl woodgrain finish to give you similar results without the maintenance. If you're only looking for a white interior and don't want the maintenance, a fiberglass or vinyl window would be the best choice from what is offered in the market today (vinyl will be less expensive - not necessarily cheaper quality). If you are going to change out a window to a french door and a door to a window, then you WILL NEED to find a contractor with some carpentry experience. Some companies will tell you upfront that they do not handle those sorts of remodeling projects due to the complexity and time it would take to get it complete. Unfortunately, we won't be able to personally help you with your project as we work in the New England Area. and I'll be happy to let you know our prices for what we offer so you can compare and hopefully find a similar company to do the work for you near the Austin area.

Water coming in around windows & from above? What roofing or other issue is this? Get your roofer back out there. Course of shingles above the window need to be pulled, self sealing flashing, drip caps, and counter and step flashing are going to be required here. This is a flashing issue as the window connects to the mansard roof surface. Condensation and a leak are two different and very noticeably different (i.e. volume) things. Flashing and roofing on Mansards can be tricky but is sounds very much like a roofing issue.How much does it cost to replace an average bedroom window For a broken window (or leaking seal in multi-pane unit), for a standard roughly 2x3 foot window, can run from low of about $75-125 for single pane to more like $200-300 range for triple pane, depending on construction and any special ultraviolet or heat reflective coatings. If a removeable window unit, of course cheaper to remove it and take to replacement glass place then have them come out, measure glass size, order glass unit, then come back to install.

If taking in yourself, commonly they can do single-pane in an hour or two, but count on a week or so typically for sealed double or triple pane unit to come in, so you will have to seal the opening in the interim.
garage panel doors adelaideThat is an advantage of having them come out - they measure and determine type of unit on first visit and can seal with tape and plastic sheeting (if you have not already done that), then come back with new unit and install a week or two down the road - but you are not stuck with an opening in the wall for a long time.
pella garage doors customer serviceDoes anyone install acrylic windows ?
pella garage door warranty Much easier to scratch and typically not as good a finished quality as compared to glass.

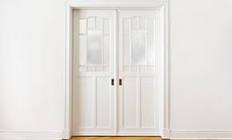
Benefits are the resistance to breakage as mentioned by LCD. Any glazing shop should be able to re-create that panel.33.5 in. x 81.75 in. Primed Craftsman Smooth Surface Solid Core Interior Door Set your store to see localavailability Check the rough opening Place a 4-foot level on the floor in the doorway. If the hinge side is lower than the latch side, slip shims under the level nearest the hinge jamb. Adjust the until the level's bubble is centered. Tack the shims to the floor with a finish nail. If the latch side is lower, no shims are needed. Check the walls and the trimmer studs for plumb using a level or plumb bob. Also, check the trimmers' faces with a framing square to see if they are square to the wall. Finally, check that the trimmers are parallel by measuring between them at the top, bottom, and middle of the opening. If the wall is out of plumb, or the trimmers are out of plumb, out of square, or not parallel. On the hinge jamb, measure from the bottom of the jamb to the center of each hinge.

Mark the hinge locations on the hinge-side trimmer by measuring up from the floor (or top of the shims). Tack the plumb bob to the top of the hinge-side trimmer, and measure the gap between the string and the trimmer at each hinge location. Where the gap is the smallest, place overlapping shims. Adjust the shims to 1/8 inch thick, and tack them with a finish nail. Measure the gap between the shims and the plumb bob string. Place overlapping pairs of shims at the other two hinge locations. Adjust each pair's thickness until the gap between shims and string equals the gap at the first pair. Nail each pair to the trimmer and cut off the ends with a utility knife so they don't protrude past the drywall. Fit door into opening Lift the door into the rough opening and push the hinge jamb tight against the shims tacked to the trimmers. Tack an 8d finish nail through the face of the hinge-side casing 3 inches below the miter, into the trimmer. Hold a level against the face of the casing and adjust the jamb in and out until plumb.
If the wall is plumb and the casing rests flush against it, tack 8d finish nails through it at the other two hinge locations. If the wall is out of plumb and the casing does not rest against it, shim behind the casing at the hinge locations to make the door plumb. Nail through the casing and shims and into the trimmer. Fill any gaps between the casing and the wall with tapered wood wedges. Check the horizontal gap, or "reveal," between the top of the door and the head jamb. It should be uniform from left to right and 1/8- to 3/16-inch wide. If necessary, adjust the reveal by pushing up the head casing. Set this reveal by driving an 8d nail through the face of the latch-side casing and into the trimmer, near the top of the door. Check the vertical reveal between door and jamb on the latch side. It should be about the thickness of a nickel. To adjust it, grab the casing and move the jamb by hand. Open and close the door to check that its leading edge, the one that rests against the stop, clears the jamb by a consistent 1/8 inch.

Set the reveal by driving 8d finish nails every 16 inches through the latch-side casing and into the trimmer. Make sure the reveal remains consistent. Slip a pair of shims between main jamb on the latch side and the trimmer, near the top of the door opening. When they are just touching the back of the jamb without putting any pressure on it, nail them to the trimmer with 8d finish nails. Nail additional pairs of shims a few inches above the base of this jamb, as well as just above and below the strike plate. Without these shims, the jamb could flex. On the hinge jamb, remove the center screw from the top hinge leaf and replace it with a screw that's long enough to penetrate the trimmer. This prevents the door from sagging and binding. Tip: If the long screws don't match the ones that came with the hinges, install them behind the hinge leaf. Attach the split jamb Starting at the bottom, gently push the edge of the split jamb into the groove in the main jamb.

Tap the two jambs together using both hands. Nail the casing to the wall on both sides of each miter, and about every 18 inches along the casing. To hold the two jambs together, drive 8d finish nails through the stop and into the trimmers: one nail at each hinge location, one through the shims near the top and the bottom of the latch jamb, and one each just above and below the striker. Do NOT nail into the head jamb. Mount the latch hardware Fasten the strike plate to the mortise in the latch jamb using the screws provided. If the plate is bigger than the mortise, put the plate on the jamb, outline it with a pencil, and chisel to the outline. Slip the latch bolt into its bore and fasten its plate into the mortise on the door's edge with the screws provided. If the mortise is too tight, adjust its size in the same way as you did the strike plate. Fit the knobs to both sides of the latch bolt, then insert and tighten the connecting screws that hold the knobs together.