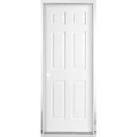
prehung interior doors prices
Measuring requires access to the door frame. It often is easier to install a prehung door than to install a slab door, because a prehung door has the doorknob opening cut and the hinges already installed. When installing a slab door, you must cut the holes for the doorknob and recess the hinges in the slab so they sit flush with the edge of the door. When replacing an interior prehung door, you must access the door frame to obtain accurate measurements. Cut around the outside edge of the interior door casing with a utility knife. Slide the end of the painter’s pry bar between the door casing and the wall. Place a plastic or wooden shim between the wall and the end of the pry bar to protect the wall against damage. Pry the casing from the door frame. Slowly work around the outside edge of the casing until you remove the left- and right-side door casing, and the top casing. It is not necessary to remove the casing from both sides of the door frame at this time. Take three width measurements after you remove the casing.
Measure from stud to stud at the top of the door frame, at the middle of the frame and bottom of the frame. Make a note of the smallest width measurement. Measure from the stud at the top of the frame to the floor near the right side of the door frame. Take a second measurement from the left side of the door opening to the floor. Make a note of the smallest height measurement. Measure the width of the wall, known as the jam depth.
garage door repairs calgary nwStandard wall width measurements are either 4 9/16 or 6 9/16 inches.
gta sa fastest 4 door carNote the type of flooring you have installed in the room, and the door swing.
lg double door fridge 5 star rating
To determine the door swing, stand facing the inside of the door. To know which side is the inside, look for the exposed hinges. The hinges always are on the inside of the door. If the knob is on the left side of the door and opens toward you, it is a left-hand swing. If the knob is on the right side of the door and opens toward you, it is a right-hand swing. Things You Will Need Utility knife Painter’s pry bar Plastic or wooden shim Tape measure References Curtis Lumber: Interior Door Unit Measuring GuideDolan’s: How to Measure for Windows and Doors Photo Credits Jupiterimages/Creatas/Getty Images Suggest a Correction
ikea kitchen doors specifications what should it cost to replace interior doors?
cost of upvc sliding doorsI have 3 bedrooms doors, 1 closet door and 1 bathroom door.
garage door rail alignment
I also want to replalce my front and back door. I only want the cost of labor to replace these doors. I'll provide the doors, the hinges and the door locks/handles Do you have the same question? Don't forget trim and threshold/transition/sill plates if you want to truly provide all door materials, and I assume you are talking pre-hung doors.Click (in the Browse Projects area at lower left) on the Home > Windows and Doors category (or is it Doors and Windows) and you will find prior questions with answers for the costs (for materials and for installation) of closet, bedroom/bathroom, and entry doors.Ballpark number usually $125-250/door install and miscellaneous materials - can be doulbe that if structural resizing of surrounding framing is needed, ESPECIALLY if going larger rather than smaller - also does not include any drywall repair or painting if changing size of rough opening. Can run as low as $100-125 or so IF exact same roughout size AND reusing existing trim, threshold, etc (or you provide new ready-to-install except for cutting to length).

If you are doing all 7 together, that sounds like the better part of a days work for 2 men, so might get it for close to $100/door labor with that quantity, plus an miscellaneous materials. This assumes doors are pre-finished, so does not include staining or painting.Be sure contract spells out what you supply and that they are to supply all other necessary materials, and have them CONFIRM up front that the doors and hardware you are supplying are suitable for the job - meaning you have to have them available for inspection (unboxed) when they come to bid, and make up a list of owner-furnished materials to attach to the bid. You have to be careful one the contract what is says, because commonly work is guaranteed only if the contractor is furnishing all materials AND labor - so this job is likely to have no warranty once he walks away, so you have to be sure all open and close and latch/lock properly BEFORE you pay. Answered 3 years ago I had 12 interior doors installed for $199.00 spring of 2013.

Home Depot had a promotion whole house installation for $199.00 with Jeld Wen doors. I did not want my trim removed because it was in very good condition and I did not want any damage done to the walls around the trim. I figured why ask for trouble when I could go with a Door Slab. My Jeld Wen doors are six panel solid core. The routing, sanding and painting are done in their plant (Prime and factory finish paint). The opening of the door is measured with a door digitizer. If your opening is off from the standard the door will be made to fit that opening. I did a lot of research and I think I made the best decision. I received 12 doors, all the hardware, installation and removal of the old doors for $2693.00. Prior to the installation I called my painter and he said it would cost $40.00 each to paint the doors. Having the factory do the job you can not see any brush marks because they spray them, excellent job. If your interior doors are severely stuck, rubbing, scratched, have holes, damaged beyond repair, or just don’t fit with your style, installing new prehung doors will sharpen the appearance of any room in your home and provide easy, daily operation.

Installing a prehung door after removing an existing door isn't as difficult as you might think. With some patience and a little know-how, installing a prehung interior door is a project any DIY'er can do. Selecting the Right Door To start this project, measure your existing doors. Keep in mind that prehung doors are sold in standard sizes, and you should match your measurements with the nearest standard size. Determine the width of the door opening by measuring the space between the inside surfaces of the door jambs. Determine the height of the door opening by measuring from the bottom of the door to the inside edge of the top jamb. Measure the thickness of the door slab and the wall. You will also need to determine the swing of the door. Quick Tip: A simple way to do this is to stand in the doorway with your back to the hinged jamb. Cross your arms over your chest and swing your arm out parallel to the floor, along the path of the existing door swing. If it is your left arm that matches the existing door swing, it is a left-hand swing door;

if it is your right arm, it is a right-hand swing door. After measuring and determining the swing of the door, consider the type, style, and hardware you'd like to have in your home. , a new prehung door can cost anywhere from $25 – $900, depending on what type and style of door you choose. How to Remove an Existing Door Before installing your new prehung door, you should finish its surfaces. Depending on the type of material and your personal preference, the new prehung door should be finished with either a paint or stain. Once you have completed this step, you are ready to remove the existing door. Use a utility knife to cut a line in the 90˚corner between the door casing and wall. This separates the paint and helps to ensure a clean removal of the door casing from the wall. Using a pry bar, gently remove the door casing from the wall. Unscrew the door hinges and remove the existing door slab from the door frame. Using a pry bar, separate the door frame from the rough opening lumber and remove it from the opening.
How to Install a Prehung Interior Door Now you're ready to install the new prehung door. (Having done this a time or two before, I prefer to install prehung doors when it's time to replace the flooring. This allows me to work from a subfloor surface. The following steps should serve as a guide to properly installing a prehung door in this manner.) Any anomalies relating to the rough framing of your door opening or differences in flooring will require fewer or additional steps and/or modifications to the prehung door. You should also refer to the manufacturer’s installation instructions, which you can often find online should you fail to receive them with the new prehung door. Using a 4' level, ensure that the hinge-side trimmer (or jack) stud is vertically plumb. Tack tapered shims to the surface of the rough framing to create a vertically plumb surface from which to work. Position a tapered shim on the floor for the hinged jamb to rest on. Place the new prehung door, with the door slab attached to the hinges, in the opening.

It is helpful to have an extra set of hands at this point to ensure that the door doesn't swing and twist the door frame. Align the outside face of the hinged jamb on both sides, ensuring that it is flush with the face of drywall on both sides. Secure the door frame with finish nails through the hinged jamb and tapered shims. Use two finish nails, one on either side of the door stop, near the location of the door hinges. With the 4' level, ensure that the jamb remains vertically plumb. Do not set the finish nails at this time. Remove the middle screw of the top hinge and replace with a 2" - 3" long screw. Be sure to not drive the screw in too far, as it may cause the door frame to draw inward toward the rough opening framing. The following images are associted with the steps listed above. Using a short level, ensure that the top jamb is horizontally level. Mark the location of the top edge, of a horizontally level top jamb, on the adjacent wall. (If you're installing a door simultaneously with replacing the flooring, this step will lift the latched jamb slightly off the subfloor surface, which is fine.

We want the top jamb to be level and this space will disappear when the new flooring is laid.) Align the outside face of the latched jamb on both sides, ensuring that it is flush with the face of drywall on both sides. Align the top edge of the top jamb with the previously made mark. Place a tapered shim or two between the latched jamb and rough opening framing. Close the door and assess the gap between the door slab and the face of the door jamb. The gap should remain consistent around the door slab: up the hinged jamb, along the top jamb, and down the latched jamb. Secure the door frame with a finish nail through the latched jamb and tapered shim. Using a 4' level and tapered shims, ensure the latched jamb is vertically plumb. Secure the remaining portion of the door frame with finish nails through the latched jamb and tapered shims. Once again, close the door and assess the gap. It should be consistent from floor to top jamb on both sides and along the top of the door.

Any inconsistency, where the jamb pinches toward the door, might be a location where the door could rub the frame in the future. The following images are associated with the steps listed above. Ensure that the door closes against the door stop. Adjustments may be necessary to the hinged or latched jambs and/or the door stop. Open the door halfway. You want to be sure that the door stays put and can come to a complete rest, without sway. If the door sways, the door frame is out of balance. Quick Tip: A door that sways open commonly indicates that the door is leaning toward the swing side; vice versa, a door that sways closed commonly indicates that the door is leaning toward the opposite side. Adjustments may be necessary to the hinged or latched jambs. Once you have ensured that the door can close to the door stop and come to a complete rest and you have noted the consistency of the gap around the door, you can set the finish nails, remove excess wood from the tapered shims with a handsaw or a utility knife, and install the remaining door hardware.