pre hung doors without trim

Another approach to installing prehung doors When I see a fellow carpenter install a prehung door the old-fashioned way with layers of opposing shims, I shake my head. Why hasn’t my new and improved way caught on? It’s faster, stronger, and less filling. Other installers place the door jamb in the opening and start pushing in and pulling out tapered shims, then checking the hinge-side jamb for plumb. The procedure goes in a little, out a little until the jamb looks right. Then the carpenter drives the fasteners home through the hinge jamb. This sometimes compresses wooden shims, and if the installer doesn’t overcompensate a pinch, the fasteners can knock the jamb out of plumb. My installation method minimizes tapered shims and begins the night before I plan to install the door. I start by making a pile of square shims of various thicknesses. I make them with 1/8-in. and 3/16-in. hardboard, and 3/8-in. and 1/2-in. plywood. They are typically 4-1/2 in. or 6-1/2 in. square.

Then, on my level, I use an erasable felt-tip pen to mark the centers of the hinges of the doors to be installed (get a 6-ft. 8-in. level; you’ll thank me later). Next, I mark which end of the level is up. Then I mark the hinge locations on the hinge-side trimmer and install a top and bottom shim of the same thickness (usually 1/8-in. hardboard) at the hinge locations. Now I check the two shims for plumb and add shims as necessary until perfectly plumb. Then I screw (nails are passé) the hinge-side jamb leg to these shims, and I’m nearly done.
interior bifold doors ireland If there is a center (third) hinge, I shim that location after the top and bottom are perfectly plumb.
windows and doors macon gaI use a thinner shim so that the level touches just the top and bottom shims.
front door repair tulsa
After I have the jamb screwed to the trimmer through the top and bottom shims, I tweak the center hinge as necessary the old-fashioned way, with tapered shims. I leave the door on its hinges during this operation because it’s more efficient. To hold up the latch side of the door until the jamb is positioned properly, I use a nifty tool originally designed for lifting cabinets during installation. for about $60 per pair) makes this operation a breeze. I take the plastic jaws off the jack’s mast and use the angled flange at the bottom to lift the door.
garage door services lockhartThis method for adjusting the height of the door is much easier than using a pile of shims and 2x scraps.
lowes sliding screen doors prices I use the traditional shim method to finish the installation of the latch side of the jamb.
4 door cars gta iv
Mike Zielinski, Klamath Falls, OR Get home building tips, offers, and expert advice in your inbox Come Work for Fine Homebuilding! We need a strong writer, editor, photographer, and videographer with a zeal for the craft of the trade. Keep Craft Alive: Monica Coyne, Blacksmith Windows for Low-Energy Homes Why Knowledge is Greater Than Talent or Skill Video Vault: Cutting Crown Molding Upside Down and Backward, with Tom O’Brien Rooms with a View "I have learned so much thanks to the searchable articles on the FHB website. I can confidently say that I expect to be a life-long subscriber." - M.K. Decks and Outdoor Projects, Vol. 7 The New Small House All New Building Decks Issue 265 - March 2017 Paint Problems and How to Prevent Them Dress Up a Gable With Shiplap Siding Issue 264 – January 2017 The Right Header for Every Wall SIP 52 - Remodeling, Renovations, and Repairs Contents - Remodeling, Renovations, and Repairs

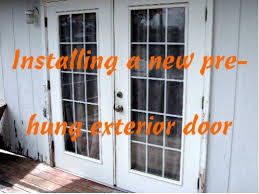
Confidence Is Your Most Important Tool Glass in the Garden Issue 263 - Kitchens & Baths 2016 The Trend is Transitional K&B: From Concept to Completion Gallery: More Inspiration From Our K&B Issue 2016 Issue 262 - October/November 2016 Make a Built-in Breakfast Nook Slab Foundation for Cold Climates Bungalow on a Budget Subscribe to Fine Homebuilding magazine now and save up to 52%Edit ArticleHow to Hang a Prehung Door Three Parts:Mounting the DoorMounting the HardwareFinishing Your WorkCommunity Q&A Pre-hung doors are doors that come from the manufacturer installed in a door frame. Pre-hung doors are purchased with the hinges attached to the door and frame, unlike traditional doors that come with no frame and no hinges. Pre-hung doors are easier to install than traditional doors because the door arrives at your location already built into the door frame, eliminating the need for exact measurements to prevent gaps between the door and frame.

Follow these steps to hang a pre-hung door. Determine if a prehung door is right for your situation. Analyze your experience level. If you aren't a skilled builder, a pre-hung door may be easier to install because they come weather tight and gap free. There are two other things to consider: Determine if there's a door frame where you want to put the door. If there's an open area for the door, rather than a frame, it will be easier to use a pre-hung door unit. Consider the condition of an existing door frame. If it is damaged or in poor condition, you might want to remove the door frame and use a pre-hung door. Familiarize yourself with the necessary parts. This guide will likely have a few words you're not incredibly familiar with. Here's what you'll find in your prehung door kit: Latchbolt and lockset bore (part of the doorknob) Latch jamb and head jamb (the frame of the door that supports it) Mortise for strike plate (where the lock goes into the wall)

There are a few terms that will also be used that are a part of your house. These are the header (the part of the wall framing above the door), the king stud (the stud in the wall that supports the header), and the trimmer (the stud in the wall that is next to the jamb). Determine if the floor is level where the door will be hung. The pre-hung door will come with long sides on the frame. This will allow you to cut each side of the door frame according to how level the floor is. Cut the sides of the door frame if the floor isn't even. If the floor isn't level, one side of the frame will be shorter than the other to fit with the floor. This will not be noticeable after the door is in place. Make sure the rough opening is plumb. If it's not, install wooden shims between the rough opening and the door frame. A shim is a thin, tapered piece of wood that is used to fill in the gaps in the door frame. Using shims avoids the necessity for rebuilding the door opening to fit the pre-hung door.

Use shims on the side of the door with the hinges to remove the gaps between the trimmer stud and the door frame. The door should be square. Have another person hold the pre-hung door in place while you install wooden shims where necessary. Ensure the door frame is flush with the wall. Hammer a few large finish nails into the frame on the hinge side of the door. Make sure the nails go through the frame and into the shims and trimmer. Leave part of the nails out, not hammering them all the way into the frame until you are sure the door is plumb.To shim is to wedge a thing into an area for purposes of measuring or centering. Here's what you need to do: On the hinge jamb (the upright support of the door by the hinge), measure from the bottom of the jamb to the center of each hinge. On the hinge-side of the trimmer (likely on the left), measure up from the floor and mark the hinge locations. Tack the plumb bob to the top of the hinge-side trimmer. Then, measure the gap between the string and the trimmer where each hinge is located.

Place overlapping shims where the gap between the two is the smallest. Make the shims 1/8" thick (.3 cm), and tack them with a finish nail. Measure the gap between the new shims and the plumb bob string. Place overlapping shims at the bottom two hinge locations on either side. Adjust each pair's thickness until the gap between shims and string is the same as the gap of the first pair. Nail each pair of shims to the trimmer and cut off the ends with a utility knife; this is so they don't come out past the drywall. Fit the door into the opening. Take the door and lift it into the opening. Then, push the hinge jamb tight against the shims that are tacked to the trimmers. With 8d finish nails in hand, here's how you progress: Take an 8d nail and tack it through the face of the hinge-side casing 3" (7.5 cm) below the miter and into the trimmer stud. Using a level against the face of the casing, adjust the jamb until it's plumb. If the wall is set correctly and the casing rests flush against it, drive 8d finish nails through it at the other two hinge locations as well.

If the wall is out of plumb and the casing is not resting correctly against it, shim behind the casing at the hinge locations to make the door plumb. Nail through the casing and shims and into the trimmer stud, securing the door. It's also a good idea to get rid of any gaps between the casing and the wall with tapered wooden wedges.This is the horizontal gap between the head jamb and the top of the door. It needs to be 1/8 to 3/16" (.15-.3 cm) wide and uniform from all angles. If you need to, adjust this gap by pushing up the head casing. Drive an 8d nail through the face of the latch-side casing and into the trimmer stud, near the top of the door, to set everything in place. Don't forget to check the vertical reveal between the door and jamb on the latch side, too. It should be about as thick as a nickel. Grab the casing and move the jamb by hand to adjust. Swing the door open and close to see if its leading edge, the one that rests against the stop, clears the jamb by a consistent 1/8" on all sides.
Drive finish nails every 16 inches through the latch-side casing and into the trimmer to set the reveal at the appropriate width. Leave the heads sticking out slightly so they can be set and puttied later. Make sure everything is consistent.To keep the jamb where you want it, slip a pair of shims between the main jamb on the latch side and the trimmer, which is near the top of the door opening. When they are just touching the back of the jamb and not adding pressure on it, nail them to the trimmer with more 8d finish nails. You'll want to nail additional pairs of shims a few inches above the base of this jamb and above and below the strike plate, too. Without these shims, the jamb could flex, moving out of place. Replace the hinge screw. On the hinge jamb, remove the center screw from the top hinge and instead use a screw that's long enough to drive into the trimmer stud at least 1 inch. This will keep the door from sagging and binding. If the long screws don't match the ones that came with the hinges and door, you can install them behind the hinge leaf so they're not visible.

Attach the split jamb. On the outside of your door, there will be a split jamb – it's the one in two pieces. To attach it, start at the bottom and carefully push the edge of it into the groove of the main jamb. With both hands, tap the two pieces together. Nail the door casing to the wall on both sides of each miter, in addition to every 18 inches along the casing. Once they're together, you'll want them to stay that way. Drive more 8d finish nails through the stop and into the trimmers. You'll need one nail at each hinge location, one through the shims near the top and bottom of the latch jamb, and one just above and below the striker. Be sure not to nail into the head jamb. Mount the latch hardware. The door is up – now all that's left is the small hardware additions. To assemble the latch: Fasten the strike plate to the mortise in the latch jamb with the screws provided in your kit. If the plate is bigger than the mortise, put the plate on the jamb, outline it, and chisel it to the shape of the outline.

Slip the latch bolt into its bore and fasten the plate into the mortise on the door's edge with the appropriate screws. If the mortise is too tight, adjust its size just like you did the strike plate. Fit the doorknobs to both sides of the latch bolt. Once you're done with that, insert and tighten the connecting screws that hold the knobs together. Test out the knobs and make sure they're secure. Close the door and listen for it to latch. If the door rattles, bend the prong on the strike plate just a little toward the stop. If the latch doesn't catch this time, bend the prong away from the stop. Once you find the right arrangement, tighten all the screws. Use putty to hide the nail heads on the door frame. To make your door look sleek and like it was installed by a professional, hide the nail heads with putty. It is commercially available in many shades – you should be able to find one that matches your door. Once applied, smooth it out with a scraper or the blunt edge of a knife.