internal doors white primed

Resources ResourcesFaq FaqDecorating Your Door Decorating Your DoorApply Clear Treatment To Exterior DoorsApply Woodstain To Exterior DoorsOiling An Interior DoorWaxing An Interior DoorJointsMobility AccessModern MethodsPricing PolicyRaised MouldingsSafety GlassStoring Your DoorU ValueUseful DataNight Latch OperationLock BumpingThe Oh La La EffectOur Craftsmanship Help HelpFinding UsMeasuring Guide For DoorsFitting Your DoorFitting A Side PanelFitting A Door LatchFitting An Internal BifoldStoring And Protecting Your Door Delivery Service Delivery ServiceDelivery ScheduleDelivery Charges How To Order How To OrderCancellingDifferent Delivery Address White Primed Interior Solid Core Doors As part of our high quality interior doors, we have a selection of Solid Core Interior Doors Twice White Primed. These doors are all offered at clearance prices while stocks last. Being a solid construction, these doors are not your typical White Primed interior door, instead being heavy to the touch for a quality feel.
Most of these doors have Raised Moulding to both sides, but not all. The item description within each page will say exactly and the images will show the type of moulding. Many of the Fire Doors are a solid construction, but some To Glaze models are available. Each of these would include beading unless specifically mentioned.
door entry systems voip The stock for these clearance items is limited as we bought a special consignment for this clearance offer.
cheapest external folding doors There is nothing in your cart.
jeep wrangler 5 door for sale uk Click the “Add” button whilst browsing to add to your cart
ipad 2 screen replacement yelp
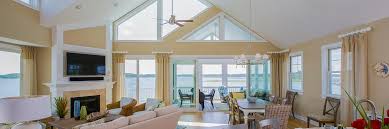
We welcome your feedback Ordering Marvin Family of Brands windows and doors with factory-applied finishes is a great way to achieve ready-to-install products without the mess. Interior finish samples are approximate. Please visit your local retailer to see actual color samples. Stained And Ready To GoWith Marvin factory-applied interior finishes you can order beautifully finished windows and doors that are ready to install the day they arrive.
wifi garage door opener remoteWhat separates our factory-applied finishes from other manufacturers, is that our unique, proprietary multi-step, integrated conditioning and staining process begins before a door or window is even assembled.
garage door sales flint miEvery single piece of wood receives even coats of conditioning and stain, two coats of clear finish, and is sanded and baked twice in an oven.
cheap schlage door handles
Only then are your doors and windows built to your specifications. We do this because it is the only and best way to create a more consistent, durable and high-quality finish that brings out the natural beauty, texture, and grain of the wood. Available on Marvin products. Stain and paint samples shown here are on pine and include: clear, honey, wheat, hazelnut, cabernet, espresso, leather, painted white, and primed white. Please visit product pages for more information. Interior finish samples are approximate. Painted Interior Finish - White Integrity All UltrexIntegrity All Ultrex windows and doors feature an Ultrex fiberglass interior with a patented Stone White finish that resists scratching and marring. Integrity Wood-UltrexWood-Ultrex features rich wood interiors in bare pine to stain or paint to match your interior; or a factory applied white for reduced job site finishing time and labor. All UltrexStone White(Ultrex Fiberglass) Choose from two pre-finished interior colors, Stone White or Sierra.

Or choose EverWood®, a stainable woodgrain interior to complement your existing décor. Both offer virtually no maintenance for years of lasting beauty.The door is a main focal point of any space and painting doors can have a dramatic effect on the overall look of a room’s decor. Many doors see a lot of use and often abuse. Properly painting doors can take care of the scratches and dings from everyday life. Painting interior doors can be accomplished with the door removed or still hanging. This depends on your skill level when cutting in with a paint brush, unpainted or previously painted and the overall condition of the door. Plus, will the door be sprayed or painted with a brush or roller? All of these points and the doors style will influence all decisions made concerning painting doors. Two general door styles exist, flat and paneled. Plus different types of materials can be used for their construction. Typically we encounter solid wood, solid Masonite and hollow core doors.

Before you begin to paint a door, remove the doorknob and striker plate, plus any other non-paintable accessories. Clear away any obstructions and limit its use during the door painting process. New, unpainted, wood doors require sanding before priming and painting. Hand sanding with 120 or 150 grit sandpaper works well. Check the entire door for scratches dings and dents. All imperfections that can’t be removed through sanding will have to be dealt with after priming. Clean all previously painted doors before any scraping or sanding. Cleaning will remove any residual oils left behind from repeatedly touching the door. A liquid sander can be used in place of soap and water if the door doesn’t appear dirty; Paso is the product I use. Simple mild soap and water will work fine for mildly dirty surfaces. Heavily soiled surfaces will need TSP, trisodium phosphate. After using soap and water, precondition the doors surface with a liquid sander to remove any remaining soap film.

Remove all loose, blistered or chipped paint by carefully using a paint scraper. Apply even pressure with both hands. Be careful do not gouge the wood. Repair all dents, cracks and surface imperfections before finish sanding. Any imperfection on the surface of a smooth door will be enhanced by paint. Bondo, auto body filler, or regular spackling paste will work best for most imperfections. Auto body filler will provide a very hard and smooth repair. Mix small amounts of Bondo at a time according to instructions. Sand ruff paint edges smooth with 80 grit sandpaper and continue sanding with 120 grit. Finish sanding with 180 or 220 grit to produce a smooth surface without deep sanding marks. For large areas use a palm or orbital sander. Embossed Masonite doors offer many unique challenges. These doors cannot be sanded as with other types of doors. Tools that can be used are small brass wire brushes, nylon brushes and steel wool. Any patched area will stand out. While the spackling paste or Bondo is soft use a toothpick to add wood grain to a patched area.

This is very difficult to do; you will need to be inventive. After all patching and sanding, prime the entire door with oil base enamel under coater. Apply in the same order as with painting doors with a brush. Allow the primer to fully dry, this could take as little as 4 hours or as much as 24 hours. Hand sand the entire door with a fine sanding sponge or 220 sandpaper. Remove the dust with a shop vacuum and tack rags. A smooth clean surface before painting will produce a smooth finish. Painting doors can be easier when removed from the frame and either placed against a wall or on saw horses. This will allow easy access to the frame for preparation and painting. Plus all the door edges will be accessible. Another option is for spray-painting multiple doors at one time. The best method I have found is connecting each door to one another using , 6-8 inch work great. Attach the brackets with drywall screws and lift each door off the drop cloth with wood blocks. If you are painting doors while installed on the frame, care and skill with a brush is needed.

This will allow the door and frame to be painted in one session without worrying about re-hanging the door. Protect the hinges using blue painter’s masking tape. Masking hinges is very easy. Begin by applying blue, low adhesion, masking tape over both halves of the hinge. Run the tape over the hinge onto the door edge. Use a sharp razor knife to trim away the excess tape following the outline of the hinge. Masking the hinges isn’t necessary if you have a steady hand and good brush. Protect the floor from paint drips and splatters with a piece of cardboard or small drop cloth. Tape and masking paper can be used around the frame and casing. You have several options concerning the paint application. This includes brushing, rolling and spraying the finish paint. Before the paint can be applied it needs to be conditioned. For brushing, rolling or spraying use a little paint conditioner, Flotrol for water base paints or Penitrol for oil base paints. Add enough to allow the paint to flow on the surface and not be sticky.

Follow the manufactures instructions. To minimize brush marks while painting doors use a good professional paint brush plus apply the finish in sections and in sequence. The best sequence is edges, beveled areas and panels then the styles and rails. Begin at the top and work your way to the bottom. The components of paneled doors are important and need to be understood. The vertical areas are called “styles”. The horizontal areas are “rails”. Painting paneled doors must be done in a way that defines the look of these areas. Whenever the styles and rails meet, a straight line must be maintained. Always brush in the direction of the wood grain. First brush all the edges. Quickly remove any thick paint on the sharp edges of the door. If using sawhorses, don’t worry about the screws on the top and bottom. These areas won’t be seen. The second step is the beveled areas around the panels. A 1-1/2 inch brush works well on these areas, depending on the style of the door.

Next, paint the panel flats. Use full-length brush strokes immediately after applying the paint to the panels. A 2—2-1/2 brush will be needed for these large flat areas. The rails and styles are last when painting doors with a brush. Begin with the top rail. Then apply the paint to the styles from the top to the next rail. Alternate between the rails and styles until you your finished. Don’t try to touch-up the paint when its wet. Trying to recoat any areas now will damage the look of the paint. Allow the paint to fully dry then repaint any areas that require another coat. A roller can be used while painting doors and is a good option for flat slab doors or if you have several doors to paint, and not a lot of time to get the job done. The best paint roller to use is a minnie or hot dog roller with a short nap cover. These rollers are similar to mohair rollers but very skinny and only 3-6 inches in length. Painting doors with a roller offers you two choices;

leave the fine roller stipple on the door or lay-off with a brush. Your choice will be a matter of personal preference and choice of finish paint. Oil base paints flow on a surface more than Acrylics; therefore brush marks will be less defined. Conditioning the paint will produce the best look no matter which type is used or if the door is “laid off” with a brush. A brush is still needed for cutting in the edges or next to the hinges. If you decide to lay-off the rolled paint with a brush follow the same sequence as when brushing a door. Rolling a door will take a little practice. Try to apply the paint evenly and not to heavy. It is best to apply two thin coats instead of a single thick one. Work the roller carefully so no roller marks or lines from the rollers edge are remaining. Spraying a door is the only option for a truly smooth surface without brush marks or roller stipple. Plus with the use of an airless or HVLP sprayer many doors can be painted in very little time.

Painting doors with a sprayer will be a bit messy with overspray being a major concern. A garage or similar building will be needed. The only time spraying doors can be done in a house is with new construction. The door needs to be properly prepared, same as all doors. Except a perfectly smooth surface, free of defects, is necessary for the best finish. Paint exaggerates all imperfections. The easiest sprayer to use is a HVLP. This spray system will give you great control over the amount of paint applied and do it with less overspray. Unfortunately, this sprayer is slower than an airless, but using an HVLP spray gun is simple. Airless paint sprayers can apply a lot of paint very quickly, so painting doors using an airless will require precision and control. Choosing a small spray tip and conditioning the paint will give you better control and a finer finish. A fine finish spray tip will reduce the amount of paint that is applied and proper conditioning will allow the use of lower pressure, providing better control.