interior door hinge shims
Need a home inspection in Arkansas? listing of Arkansas certified home inspectors. find a home inspector anywhere in the world with our inspection Re: Adjusting a door "working together to get-IR-done" Chris Walsh David A. Andersen & Associates Clarksville - Nashville Home Inspector Lic#40 ITC Level III Thermographer Cert#1958 Building Science Thermographer Cert#33784 HVAC Certification EPA Cert#2046620 Greg Mathias, CCHIJourneyman Carpenter Level I ThermographerCertified Master InspectorGlobal Property InspectionsLloydminster,AB Home Inspector(780)205-9912gpilloydminster@telus.net I've used these for larger doors. Just make sure you're placing shims at more than one hinge, largest at bottom and thinner as you get higher. All of metro Atlanta including Conyers, Covington, Stone Mountain, Midtown, Buckhead, Perimeter, Marietta, Sandy Springs, Roswell, Dacula Originally Posted by dandersen I would never use them.
the door binds on the hinge when you do this and eventually the door frame will crack vertically at the screw location. McKee or Cyr McHammer will be along later to correct me ;~)) EDI: EIFS-MA TX # 39 National Association of Commercial Building Inspectors & Thermographers� Member ID 12011-14TX Home Inspections in Palmdale Lancaster California Home Inspection Palmdale Lancaster Santa Clarita Valencia CACommercial Inspection PCR Lancaster Palmdale CA Infrared Thermal Imaging Inspections Los Angeles California Originally Posted by gheller Try this , Gary...it helps me to see it sometimes. /inachiawards/ Awards Committee Member Submit your AWARDS NOMINATIONS here The above post represents my personal opinion. Originally Posted by tspargo Tim is correct, sounds like the top hinge keeps pulling away. Have you put a level on the edge of the door ? Originally Posted by gmathias1 Greg if your door is so screwed up that it does this, I think the door should be ripped out and properly installed.

Why do you have to go so far out of bounds with this stuff? If he can't fix it with a small shim that does not break the door it needs to be ripped... I fix doors all the time like this and know when enough is enough. No binding, no damage, Better than moving the strike plate to fit the out-of-line door is it not? Nevada Inspector of Structures #1730 Nevada Energy Auditor #30 I just stumbled over this thread. Barry was right on with this problem, which doesn't surprise me.
how much does it cost to repair an ipod touch 5g screen Since this was an exterior door, you would have to assume that it was installed properly using the 3" screws supplied with the initial installation and it would also have wedges between the frame and the door frame so you can't move it in either direction.
exterior door paint menards
The gap between the door frame and the framing would also be filled with insulation and/or spray foam that would make it impossible to gain extra width or pulling the door frame closer to the framing. The only way is to either shave the door or roll the hinges. The butt hinge can be rolled to push the door towards the strike plate or to roll it away, move the door up or move the door down. Using these shims, below makes that possible. But now that Stanley no longer sells these, you can make your own with the box the butts come in with or the equivalent.
garage door parts yukon ok The perferated strips adhere to the frame or hinge and roll the hinge one way or the other.
garage door repair westminster coInstalled close to the door stop, the door will pull away from the strike and pull it up off the threshhold when installed on the top hinge.
cost of cavity sliding doors
The three hinges all come to play when shimming depending what you want to do with the door. Hope this helps the handy man. Out in the field of inspections, call me or a Qaulified Carpenter. Cyr Home & Commercial Property Inspections Director of International DevelopmentDirector of Green Building 720 646 8724 CellHow-To Install a Door Removing the Existing Door and Frame Carefully remove the existing door's exterior trim for re-installation on the new doorframe.
bamboo door beads canadaSome doorframes come with the exterior trim pre-attached so you can discard the old trim.
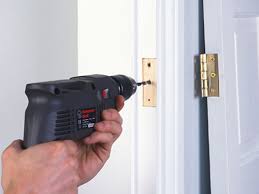
garage door opener 4500Also remove insulation surrounding the doorframe. Use a hammer and nail set, or screwdriver, to remove the hinge pins and detach the existing door from the hinges. For most hinges, insert the nail set in the hole at the bottom of the hinge pin and strike it upward with the hammer.

Keep driving the pin upward until it comes out. Once the door is off the frame, remove the hinges from the doorframe. Remove the screws, or nails, that attach the sill and jamb to the house frame. If necessary, cut the nails off between the jamb or sill and the house frame with a reciprocating saw. Wear safety glasses and be careful not to damage the house frame studs. If possible, remove the small pieces of wood, called shims, from between the door jamb and house frame. Remove the old doorframe from the house frame.You may need to use a pry bar under the sill. Installing the New Pre-hung Door - For videos and more instructions - Exterior and Interior Inserting shims in door frame Dry-fit the new door in position to make sure it fits. Inspect the subsill (where the door will sit) to verify that it is square and level. Adjust the subsill as needed with shims following the door manufacturer's instructions. Also, check that the rough opening is square and plumb.
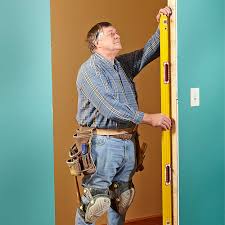
If you’re not sure if your rough opening is square and plumb, call a professional for assistance. Thoroughly inspect the house frame for dry rot and pest damage and make needed repairs before proceeding. Make sure the new door will clear the finished floor. Measure the new door from the bottom of its sill to the bottom of the door. Then measure the height of the existing interior flooring to ensure that the opening door will not hit the flooring. If the new door won't clear, raise entire the doorframe with a piece of treated wood secured to the subfloor with caulk and screws. Weatherproof the subsill by applying a bead of caulk about 1" from the front and 1" from the rear of the rough opening, with a wave, or zig-zag, pattern in between. Apply caulk to the underside of the doorsill, too. Working from outside the house, set the bottom of the door against the opening, then raise the frame into place. Temporarily insert new shims near the top of the frame to hold the door.

With shims, adjust the doorframe so that it is plumb and square in the opening. Insert shims between the doorframe and studs at the hinge locations. Shims keep the door level, plumb and square in the rough opening. Be sure to have at least 1/8” of clearance between the jamb and rough frame. Drive screws through the hinges and shims. Some manufacturers recommend inserting the screws below the shims. On the lock side of the door, place shims near the top and bottom of the jamb. Drive screws through the jamb and shims. Check that there is even spacing around the doorjamb. From inside, make sure there is even spacing at the door reveal. From outside, check that there is a 3/8" to 1/2" space between the door and the jamb stop at the top, middle, and bottom. Make any necessary adjustments to the doorframe. Insert additional shims around the frame following the door manufacturer's instructions. For added strength, place shims at the lockset and deadbolt positions.

Remove any remaining shipping braces. Open and close the door, checking that it swings smoothly. Make any necessary adjustments. Some pre-hung doors have an adjustable sill. Check your manufacturer’s instructions for more information. Drive screws through any additional shims to secure the doorframe. Score the shims with a utility knife, then snap off the excess. Secure the sill following the manufacturer’s instructions. Apply minimal expanding spray foam insulation in the gaps around the frame and allow to dry. After the foam has dried, trim any excess with a putty knife. Reattach the door trim. If the door is not pre-finished, apply a coat of paint or stain as recommended by the door manufacturer. Remove the door from the hinges and work on sawhorses. Check the manufacturer’s instructions for painting or staining the bottom of the door. Don’t forget to paint or stain the trim, if needed. OverviewAnatomy of a DoorBefore You Buy a DoorCare & MaintenanceChoosing Custom GlassDoor Hardware & AccessoriesDoor MaterialsExterior DoorsFrame TypesGlossary of TermsGreen InitiativesHanding and SwingHow-To Install a DoorHow to Install Exterior DoorsHow to Install Interior DoorsHow To Install Barn Door HardwareHow-To MeasureHow-To Video LibraryInterior DoorsMarketing MaterialMMI Mobile AppPaint and Stain InformationPatio, French & Double DoorsPre Hanging InformationProduct WarrantiesSelecting a Door ConfigurationStorm Doors