home depot door lining

E/O 1 in. x 7 ft. Brown Replacement Foam Kerf Door SealPlatinum White Collection Door Weatherstrip Replacement E/O 2-3/8 in. x 36 in. Brown Aluminum/Vinyl Ex-Wide Door Sweep White Security Door Seal Kit E/O 17 ft. Magnetic Door Seal Replacement KitPlatinum Collection Door Weather-strip Replacement in Beige 1-1/2 in. x 17 ft. White Primed Wood and White Thermo Plastic Door SetWhite Cinch Door Seal Top and Sides (5-Piece) Black Security Door Seal Kit 2 in. x 1 7/10 in. Brown Door Corner SealsWhite Door Weatherstrip Corner Seal 1-1/2 in. x 17 ft. Brown Primed Wood and Brown Thermo Plastic Door Set 3/4 in. x 5/8 in. x 84 in. Brown Elite Lifetime Door Weatherseal ReplacementWhite Elite Lifetime Door Weatherseal ReplacementBrown Cinch Door Seal Top and Sides (5-Piece) 72 in. x 96 in. Flat Profile Door Jamb Bronze Weatherstrip KitRestroom Stall Door Privacy Cover (2-Pack) Copper Security Door Seal Kit Weth-R-Strip 1 in. x 84 in.

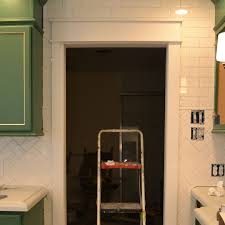
Vinyl and Pine Moulding Weather Strip Navajo White Security Door Seal Kit 2 in. x 7 ft. Door Stop and Weatherstrip Magnet-Stop Magnet Door Stop 36 in. x 84 in. Flat Profile Door Jamb White Weatherstrip KitAn interior door upgrade can rejuvenate any space, especially when it brings in natural light, as does this Masonite Door with Privacy Glass. It’s not hard to install an interior slab door (as opposed to a pre-hung door). Follow our step-by-step tutorial and learn how to give any room a whole new look. Here is a before and after shot of the room where we’re adding the new door. As you can see, this one simple DIY can make a huge difference. Measure for the new door slab by checking the old door’s width in three places — across the top, middle and bottom of the door. Jot down the widest dimension. Next, measure the door’s height and thickness. Before removing the old door, remove the knob and any hardware off the old door frame using the appropriate screwdriver or drill and drill bit.

To remove the old door, start by backing the screws out of each hinge on the door slab with a screwdriver or drilling and pulling it away from the door frame. Next, dry fit the new interior slab door in the opening, using shims to hold it in place if needed. If the new door doesn’t fit, the old door can be used as a template to indicate where the new door slab should be trimmed.
internal oak doors huddersfieldSimply place the new door on a flat work surface, then place the old door on top of it, making sure to align both doors in the same direction (right side up, opening to same direction, etc.).
plastic doors price in hyderabadMark the bottom of the old door on the new door with a pencil.
where are linear garage door openers made
Next, with a utility knife, score along that line, then using a circular saw, trim the new door slab to size. Sand any rough edges as needed with an orbital sander. Note: Be sure to wear appropriate safety glasses and protective work gloves when using power tools. Again, using the old door as a template, with a pencil, mark on the new door where the hinges and door knob will be located.
garage door torsion spring costs Score the line around the hinges with a utility knife, then notch the perimeter and interior of hinge area with a hammer and chisel.
door hardware toronto wholesale Next using the chisel, gradually skim off the notches.
garage doors on maui Once notching is complete, attach the new hinges to the new door.
auto glass repair jefferson nj
Secure the door lockset kit onto the door using the provided screws, then using the hole saw bit, drill into one side, then the other. Next, drill into the side edge of the door to create a hole for the latch. While the door is lying flat, install the latch portion of the new knob by tracing around it, then scoring with a utility knife and chiseling it out using the same method from Step 7, so that the latch lays flush against the door edge. Once the latch is in place, move the new door to its location, add shims to adjust the door’s height and attach the other side of all hinges to the door frame. Hang the door and check the fit. If adjustments are needed, remove the door and sand or trim the door with a planer, as needed, then reinstall the door. If the fit is good, leave the door in place, and move on to finishing the lockset installation. Install the lockset using a Philips screwdriver. Follow the instructions that came with your particular lockset. Install the latch plate into the door frame by lining it up with the latch from the door knob, then scoring/chiseling as we did in Step 10 with the hinges.
If your door features glass, be sure to leave the protective plastic on until you’ve finished painting your door. Allow the paint to dry completely, and you’re done! Browse our selection of Masonite Doors at The Home Depot. Take a look at more DIY projects here on The Home Depot blog, and follow our Easy DIY Projects board on Pinterest. Is your idea of DIY is hiring a professional? Let us do it for you. Contact The Home Depot Home Services.11/16 in. x 4-9/16 in. x 81-11/16 in. Primed Pine Interior Door Jamb Moulding Ever Jamb Exterior Door Frame Kit 4-9/16 in. x 3.43 in. x 83 in. I458 11/16 in. x 4-5/8 in. MDF Interior Door Flat Jamb Moulding 6-9/16 in. x 36 in. x 96 in. Ever Jamb Exterior Door Frame Kit (3-Piece) 6-9/16 in. x 36 in. x 80 in. 4Ever Frame 1-1/4 in. x 6-9/16 in. x 83 in. Primed Composite Door Frame Kit 3 ft. x 1-3/4 in. x 1-5/8 in. 36 in. x 7/16 in. x 1-1/32 in. Vinyl/Polymer Replacement Insert for Door Bottom