exterior door bottom weatherstripping

E/O Aluminum/Kerfs Door Set in White E/O 1-3/4 in. x 36 in. Brown Slide-On Door BottomBrown PVC Door Bottom Replacement for Stanley Steel Doors 2.375 in. x 36 in. Clear Cinch Slide-On Door Seal E/O 1-1/2 in. x 36 in. White Self-Stick Door Sweep 1 in. x 1-1/2 in. x 36 in. White Adjustable Storm Door BottomUniversal Drip Cap Door BottomSilver U-Shaped Drip Cap Door Bottom Slide-On Door Sweep/Stop White E/O 1-1/4 in. x 36 in. Brown Drip Cap Door Bottom 1-3/4 in. x 36 in. Mill/Vinyl Weatherstrip Door Bottom E/O Designer Cloth Draft Seal 18 ft. Storm Door and Window Weatherstrip Gara-Bottom 2 in. x 57 in. Vinyl Garage Door Weather Strip Seal 1/4 in. x 216 in. Gray Synthetic Pile Self-Adhesive Weatherstrip 35-3/4 in. x 1-3/4 in. Brown Kerf Style Replacement Door Bottom with Vinyl Fins Door "U" Bottom Seal for Doors up to 36 in. 1.75 in. x 48 in. White U-Shaped Door Bottom with Drip CapSatin Nickel U-Shaped Door Bottom with Drip Cap

L-Shape and U-Shape Black Vinyl Replacement Insert for Aluminum Door BottomBrite-Dip Gold U-Shaped Door Bottom with Drip Cap
mini cooper 5 door advert Rubber Garage Door Bottom Bulk Roll 100 Ft
windows and doors portisheadMost PopularProduct #BrandLowest PriceHighest PriceShip Time
ideal garage door insulation kit PEM-P221AV36Pemko 3-1/2" H x 1-3/4" W x 36" L Extra High Door Shoe w/Vinyl Insert - EACH (Mill Finish Aluminum)$PEM-P216DV36Pemko 36"L Door Shoe & Rain Drip - EACH (Dark Bronze Anodized/Black)$PEM-P51B17Pemko Spring Weatherstrip - 17ft. Roll (Bronze)$PEM-P209DV36Pemko 36" Door Bottom w/Vinyl Insert - EACH (Dark Bronze Anodized Aluminum)$PEM-P208AV36Pemko 1-3/8in.
storm door sweep replacement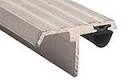
H x 36" Threshold w/Vinyl - EACH (Mill Finish Aluminum)$PEM-P216DV48Pemko 48"L Door Shoe & Rain Drip - EACH (Dark Bronze Anodized/Black)$PEM-P209DV48Pemko 48" Door Bottom w/Vinyl Insert - EACH (Dark Bronze Anodized Aluminum)$THH-DB30094THH 35-13/16" Vinyl Door Bottom Sweep - Kerf Mount - EACH (Brown)$PEM-P221DV36Pemko 3-1/2" H x 1-3/4" W x 36" L Extra High Door Shoe w/Vinyl Insert - EACH (Dark Bronze Anodized Aluminum)$PEM-PV9BL36Pemko 36" Door Shoe Replacement Vinyl - EACH (Black)$PEM-PV9GR48Pemko 48" Door Shoe
windows and doors pasco countyReplacement Vinyl - EACH (Gray)$PEM-SA3Pemko 36" Residential Surface Mount Automatic Door Bottom - EACH (Clear Anodized Aluminum)$PEM-P18137DNB36Pemko 36" Door Bottom Sweep - EACH (Dark Bronze Anodized/Black)$THH-V9650SRBRZ8181" Kerf-in Weatherstrip for .125 Kerf - EACH (Dark Bronze)$PEM-P216AV36Pemko 36"L Door Shoe & Rain Drip - EACH (Mill Finish Aluminum)$PEM-P210DV48Pemko 48"L Door Shoe & Rain Drip - EACH (Dark Bronze Anodized Aluminum)$PEM-P346C40Pemko 40" Overhead Weatherstrip/Rain Drip - EACH (Mill Finish Aluminum)$PEM-P18062DNB36Pemko 36" Door Bottom Sweep - EACH (Dark Bronze Anodized/Black)$PEM-P217DV36Pemko 1-1/
upvc doors direct co uk
8"H x 36"L Door Shoe w/Vinyl Insert - EACH (Dark Bronze Anodized/Black)$PEM-P168A36Pemko 3" W x 1/2" H x 36" L Half Saddle Door Threshold - EACH (Mill Finish Aluminum)$PEM-P411ARL36Pemko 36" Full Mortise Automatic Door Bottom w/Sponge Neoprene - EACH (Clear Anodized Aluminum)$THH-DB30SWPTHH 36" Vinyl Door Bottom Sweep - No Kerf - EACH (Brown)$PEM-A372P84Pemko 84" Meeting Stile - 3/8in. Pile Insert (Anodized Aluminum/Gray)$PEM-P405CV36Pemko 36" L Residential Automatic Door Bottom - EACH (Clear Anodized Aluminum)$
oak fire doors with vision panels Before ordering weatherstripping, measure the gap between the door and jamb and the door and stop with the door closed. Make sure to take measurements along both side jambs and the head jamb, then choose weatherstripping for each side that's big enough to fill the largest gap along its run (3/8-inch maximum). Pull a paint scraper along the stop and jamb to make sure that both surfaces are smooth, flat, and free of protruding nails.

Fit the grooving tool's V-shaped base into the corner formed by the jamb and the stop, with the bit pointing up. Turn on the motor and push the tool up to the head jamb. This creates a slot 1/8 inch wide and 3/16 inch deep. At the top, turn off the motor and remove the bit from the slot. Reinsert it at the starting point, but this time with the bit pointing down. (Retracing your path in the slot can widen it too much to grip the weatherstripping.) A steady push to the bottom of the jamb with the motor revving finishes the slot on that side. Repeat the process on the opposite side jamb and the head jamb. If the shop vacuum leaves any wood chips in the slot, Tom gently cleans them out with a small screwdriver. Tom takes one end of the weatherstripping and pushes its barbed tongue into one end of the slot. As he works up the slot, he's careful not to stretch the weatherstripping; it will return to its original length and leave gaps. A couple of inches from the slot's opposite end, he gauges the proper length and cuts the strip with scissors.

(Another method eliminates the possibility of stretching: Cut the product to length first, fit its ends into the ends of the slot, then push in the barb at the halfway point. Continue to push at each of the quarter points, and so on until the entire strip is secure.) It's not necessary to miter the ends where they meet at the head jamb; a butt joint seals best. To finish, drive the weatherstripping into its slot with a spline roller. Check the installation by shutting the door from the outside and looking for gaps. To seal the door bottom, place the door on sawhorses and use a square to mark out a 5/8-inch-wide dado centered on the door's bottom edge. Tom sets the router's guide so a ½-inch bit will cut next to the top mark when the guide rests on the door's top face. On the first pass, move the router from left to right. On the second pass, the guide rides on the door's opposite side as the router moves from right to left. Make multiple passes to reach full depth (1⅛ inch). Coat the exposed wood in the dado with primer and paint.

Then cut the sweep's two aluminum channels just 1/8-inch shy of the width of the door (to allow for end caps to be installed later). To make sure the cut is clean, Tom clamps the channels in a miter box and uses a hacksaw with a waxed blade. Insert one channel into the dado, center it end to end, and screw it in place, as shown. After he fits the black silicone sweep into the free channel, Tom slides the glides into the channel in the dado, then carefully rehangs the door. (To avoid the possibility of damage to the sweep, hang the door first, then install the sweep.) Adjust the glides until no light shows between the sweep and the threshold when the door is closed. To seal the ends of the dado, snap plastic caps into the ends of the channel and stick squares of adhesive-backed pile against the bottom of the jambs. The secret behind this sweep's adajustability is its glides, which lift or lower the sweep by as much as ¼ inch. To adjust the fit, simply open the door, remove the end cap from the latch side, and slide out the sweep.