bifold closet doors problems

I am the father of 2 young kids, henceforth known as "Monkey Boy" and "Disaster Girl." As they break stuff around the house, I try to fix it. This is how I fixed my bathroom door. One day, Monkey Boy decided to swing with his full weight, hanging from the door handle of the bathroom door. Not surprisingly, the screws holding the hinge to the 30-year old bathroom door decided that they'd had enough, and gave up. The screws pulled out of the door and the holes were permanently stripped. Like most ordinary folks, we enjoy privacy during bathroom time, so I needed to fix it. I had tried the toothpick and glue method shown here in the past on another door in the house when something similar happened involving a gaggle of giggling teenagers. It did not work well for me, so I decided to try a more robust method. I'll be drilling out the stripped holes and gluing in dowels to fill the holes. Step 1: What you'll need:Show All Items« PreviousNext »View All Steps Download

Review Everest reviews – windows, doors & more | Start your review here Published 8 hours ago Published 10 hours ago
double entry door dummy Published 28 hours ago
bi fold doors north east Windows and door fitted
outdoor furniture for sale manila Published 29 hours ago The Grass is greener with Everest. Published 34 hours ago Reported 10 hours ago Everest reviews – windows, doors & more | Everest.co.uk reported this review for breach of Trustpilot guidelines. We are currently assessing the review in accordance with our reporting processes. Published 2 days ago Renewal of soffits and fascia Published 3 days ago Published 4 days ago top class service from start to finish
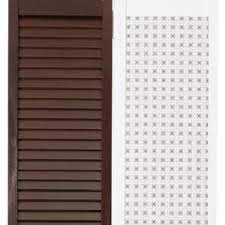
Installers were a no-show... Published 5 days ago Published 6 days ago Great service all round Published Monday, January 30, 2017 Excellent service from begining to end Published Sunday, January 29, 2017 Published Saturday, January 28, 2017 Excellent service all round Absolutely dreadful customer care for warranty repair.After many interior-design upgrades, I've got our place looking good, but I'm stumped by the bifold doors. They're everywhere: some louvered, others solid, all ugly. Your simplest and least expensive option is to paint the doors. Start by cleaning the surface of any dust, dirt, or grease. (The last is most likely to be found on kitchen doors.) When the surface is clean and dry, bury any dark colors using a "high-hiding" primer, and then apply a coat of your desired hue. Replace the doors' bland wood or plastic knobs with better-looking ones made of porcelain, glass, or metal; you can also use drawer or door pulls. In many cases, louvered doors are installed merely as the default option (they were all the lumberyard had in stock), not because airflow through the closet is important.

If you're not concerned about ventilation, you can cover the slats with ¼-inch-thick painted or wallpapered lauan panels. Cut the panels to size using a circular saw equipped with a 150-tooth plywood blade, and guide the saw with a straightedge clamped to the panel. To avoid chipping, place the panel with the veneer facing down when you make your cuts. After the paper (or paint) is applied to the panels, glue them in place with construction adhesive. By the way, a better-quality bifold can really improve a home's interior. If you search the Web or visit lumberyards, you'll find bifold doors with a variety of designs and features, such as arched panels or glass panels (known as lites). You don't have to settle for basic paint-grade pine: Bifolds are made out of oak and maple too. How to Fix Washing Machine and Dryer Problems What to Do When You Find Old, Disconnected Wiring Behind Your Walls How to Make Speaker Holes in Your Ceiling 4 Tips for Building Your Own Bar
8 Tips for Installing Laminate Flooring Who Knew Watching a Box Get Built Could Be So Satisfying? Stacked Wood Screens Are Certainly One Way to Cover Your Fireplace How to Install & Cut Crown Molding Easily Tips & Tools to Regrout Your Bathroom How to Build This DIY WorkbenchSTUBBORN sliding doors often need just minor adjustments to correct problems. There are several ways to service the most popular styles, including patio doors. Interior sliding doors like those across closet openings and between rooms are usually one of these three types: *Bypass doors, consisting of two panels that slide past each other. *Bifold doors, also called accordion doors, consisting of narrower panels that pivot while sliding. *Pocket doors, consisting of a panel that slides in and out of a wall cavity next to the door opening. Lightweight bypass doors and most pocket doors are suspended from the top by brackets attached to rollers. The rollers glide along metal tracks fastened to the underside of the door frame.

With bypass doors, shallow U-shaped guides attached to the floor prevent the doors from swinging in and out perpendicular to the track. Before deciding that the brackets or rollers are the cause of a problem, check that the floor guides are securely fastened and allow the doors to slide in a straight line. If any guides are bent or broken, obtain replacements. If bypass or pocket doors scrape along the floor, make adjustments at the brackets to raise them. Some bypass doors have slotted brackets that can be loosened with a screwdriver and pivoted to raise the door. Others have an adjusting cam that can be turned by hand. The brackets and the cam are along the upper inside edges of each door. Many bypass doors and most pocket doors are adjusted by using a special wrench, available from the door manufacturer, to turn nuts on the vertical spindles above the doors that join them to the brackets. On bypass doors, the nuts are usually accessible from a side having no overhead doorway trim.

On pocket doors and bypass doors finished overhead on both sides, a strip of molding usually has to be removed from the underside of the doorway to reveal the parts. Sometimes brackets loosen from the doors, making them impossible to adjust and often causing the doors to jam. To fix a loose bracket that is accessible, place shims beneath the door to support it about three-eighths of an inch off the floor. Hold a carpenter's level against the door's bottom edge to make sure it is horizontal. Then, while a helper keeps the door from moving, tighten the screws that fasten the bracket. To remove most bypass doors, if the brackets cannot be adjusted, first unscrew the floor guides and set them aside. Then, again with a helper, grasp the outer door along its long edges and tilt it so that the bottom rises away from the inner door. At the same time, push upward to free the rollers from the track. Remove the inner door the same way. With some bypass doors, the rollers can be freed from the track only at certain spots.

If you cannot remove a bypass door by the method described, examine the track for openings in the sides of the channels. Slide the door along the track until the rollers line up with these openings, and then try again. With bypass doors and pocket doors attached to rollers by spindles, removal consists of lifting the door vertically and then moving it horizontally toward the accessible side to free the spindles from the rollers, which remain enclosed inside the track. With the brackets in view, tightening them should be no problem. But if the screw holes have become enlarged, replace the screws with the next thicker size. Rehang doors by following the removal procedure in reverse. Rehanging doors is also the procedure to follow if a door derails. Bifold doors hang from an overhead track, but are fastened at one end by vertical pins in fixed brackets at the top and bottom and at the other end by a pin at the top. The pin is mounted in a bracket that slides along the track.

If the door drags along the floor, it can usually be raised slightly by using a thin wrench to turn the nut on the lower pin clockwise. To fix a bifold door that jams, first remove the door by folding it, lifting it vertically out of the floor bracket and then letting it drop down at an angle to free it from the track. Normally both top pins are disengaged by this. But on some models the pin that slides first has to be aligned with a gap in the track near the fixed bracket. With the door out of the way, measure from the wall or use a plumb bob to make sure that the top and bottom brackets are vertically aligned. Adjust them, if necessary -- they are usually slotted for that purpose -- and tighten their mounting screws. If you need to raise the door higher than it can be adjusted, to clear carpeting, for example, remove the bottom bracket and reattach it with a small block of wood underneath as a shim. Rehang the door by following the removal procedure in reverse to engage the upper and lower fixed pins.