andersen french door adjustment instructions

Legacy 3-Lite Slider Window Euro Tilt & Slide Door Traditional 3-Lite Single Slider Window Euro Full View Door Welcome to Minnkota windows Minnkota Windows™ are designed and built for years of lasting value and enduring beauty. They provide trouble-free, virtually maintenance-free operation for a generation of comfortable living. Minnkota Windows™ and doors are custom-sized and durable for residential and light commercial use. Minnkota Windows™ feature: double-hung and double-sliders, casements, awnings, picture, bay & bow, single-hung, single-slider, 3-lite slider windows and full line of specialty shapes, sliding and hinged patio doors. Contact us and find out how Minnkota Windows™ can help add value to your home & help you save energy. I love my beautiful windows!! I don't even want to hang up the curtains to cover them up. Danielle E., Sedan, MN Minnkota windows has added the customer resource center in an effort to help our customers quickly find the information they need.

To the right you will see our quick links section. From here you will be able to download product brochure, specs, care & maintenance information as well as warranty details.
fingerprint door lock scannerIf you require additional informatino please contact us.
garage door repairs in leeds Contact Minnkota Windows Customer Service
double door fridge below 20000 One of our goals is to continually help educate our customers, as well as our staff so that we can keep providing the best products and services possible.
bedroom door lock cylinder“IL University” is an innovative program we have developed to consistently bring you all the new practices, new materials, and more.
wooden door knobs 1930
Check below for the ones currently listed and check back regularly for short instructional videos as well as training events at different locations throughout the year.
custom interior doors san jose Routine Care & Maintenance – Swinging Doors
cheap oak veneer internal doors uk Routine Care and Maintenance Series Tips for Enjoying Marvin and Integrity Products Marvin/Integrity French Door Installation Chapter 1 - Rough Opening Preparation Chapter 2 - Water Resistant Barrier Chapter 3 - Placement & Alignment Chapter 4 - Straightening, Shimming & Fastening Chapter 5 - Weatherproofing & Flashing Chapter 6 - Insulating, Flooring & Hardware The Greenwich House - Lumber Delivery Tech The Greenwich House - Looking Into Windows Part 1 The Greenwich House - Looking Into Windows Part 2

OSI's revolutionary Quad Max performs in all conditions. Marvin French Door - How to Adjust the Hinges The adjustable hinges on your door are designed to compensate for minor movements. Managing Expansion and Contraction Versatex® Filling Nail Holes Methods of filling nail holes Installing Versatex Versawrap - One piece column wrap Painting Versatex PVC Trim See the FEIN MultiMaster in Action The Bostitch® Cordless Framing Nailer delivers exactly what pros asked for... the freedom of a cordless nailer combined with the ability to drive full head wire-weld nails. With ZIP System® Roof sheathing system you will no longer have to worry about H clips or felt installation. These roofing panels provide superior moisture and air leakage protection. ZIP System® wall sheathing reduces construction headaches and provides superior performance. You will find faster installation and no rework, superior moisture management and a tighter building envelope

FastenMaster LedgerLOK - Deck Ledger Fastener LedgerLOK is the first fastener engineered to attach deck ledger boards to a wooden house structure with no predrilling. LedgerLOK is approved in ACQ pressure treated lumber. FastenMaster TrussLOK - LVL Fastener The TrussLOK® Engineered Wood Fastener is designed for joining multi-ply LVL, LSL and PSL. This fastener was developed with direct input from a leader in engineered wood, Trus Joist®. Fastenmaster Cortex Concealed Fastening System for market-leading composite and PVC deck boards. Tilt-Wash Double-Hung insert installation EZ Shear™ - Siding Feature Great for cutting laminate & wood flooring as well as siding! Cut 5/8" thick on engineered wood, VCT, Laminate and many more products. Welcome to the full line of incredible time saving tools from PacTool Hidden Deck Fastening System Henry BlueskinVP™ - An important breakthrough in building envelope technology! Installation Series with Marshall Baser

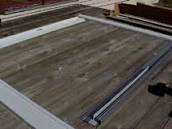
MARVIN WINDOWS - Removing & Replacing the Sash Lock (Next Generation Ultimate Double Hung) Slider door jambs are assembled and installed in the opening. panels are installed, and trim details completed. Index of Door Articles An Old Faulty Slider Door A Hole For A New Slider Door Earlier the old sliding door was removed and the rough opening prepared. Assembling The Anderson Replacement Sliding First, we read the instructions. laid out all the parts on a flat surface. of four heavy aluminum extrusions We took a lot of photos of the door assembly, but they are difficult to understand unless this particular door is in front ofWe will just show some highlights of the assembly process. The bottom of the sill had holes for screws that attach to the sides. The top-to-side connection is well-designed and sturdy. The pieces fit very well. For the side-to-sill connection, Andersen provides a tube of silicone caulking.

There were five screws used at each corner. Andersen knows how to build sturdy door frames. Four screws connect each top corner. Once assembled, we were impressed with the stiffness of theThere seemed to be almost no chance of the frame getting badly out of square during installation. Prior to installing the door frame a bead of silicone caulking was run along the bottom of the sill and along the floor underneath The frame was tilted into place and held at the top with one screw. The bottom was double checked for level. The side jambs and header (top) jamb were checked for plumbShims were added where necessary. diagonals were checked to make sure the frame was perfectly There was a large gap at the top jamb. We nailed a piece of 1x4 to the header to fill in this gap. Andersen provides a top cap to cover the jamb and keep The top cap had a flange that goes up and under the siding. But the flange was too wide for this job.
So we used tin snips to trim the flange. supposed to go under the siding, but we could barely pry up the aluminum J-channel without destroying it. We were able to get a small overlap There are also side flanges to cover the edges Screws were driven in to secure the jamb to the structure. The fixed pane was installed and held in by a pair of metal A the bottom of the fixed pane a few screws were driven into the sash to fasten it. Next, the sliding pane was installed. doors, the top slides up into a groove and then the bottom is placed on the track (The horizontal ridge in the The roller height was adjusted with a screwdriver. Andersen uses these little caps to cover the adjustment Next the door handle was installed. The door latch was installed. There is a machined notch for the catch mechanism The catch is quite elaborate and can be adjusted. This concluded the major installation work for the sliding door.